
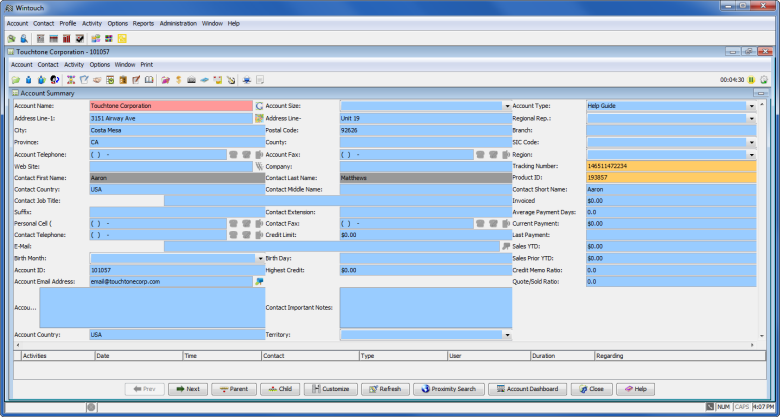
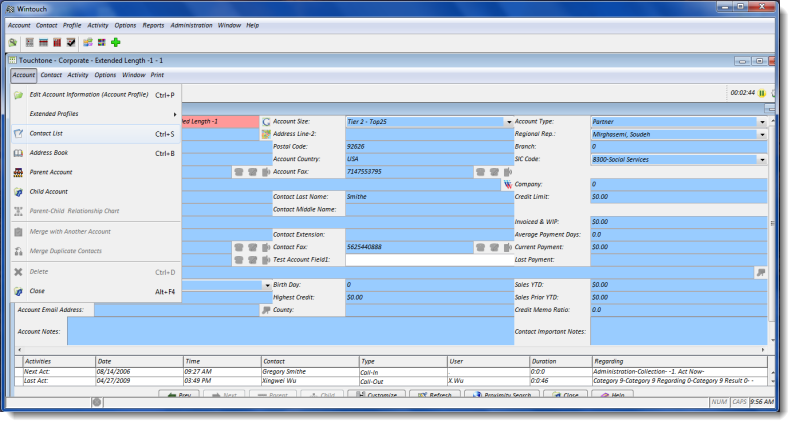
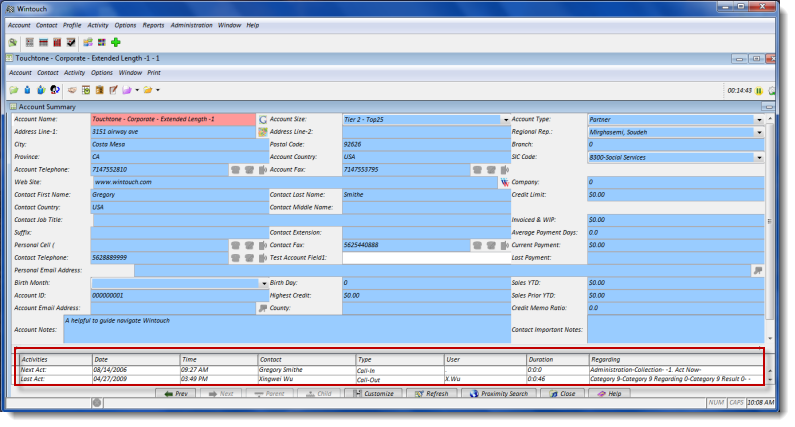
Wintouch CRM gives you a central storehouse where the different divisions of your organization can share data on prospects, customers, partners, competitors, and employees. Data is stored and presented in levels. Data that you want every division to see immediately would be displayed at the most general level, i.e. the Account/Contact level. More detailed, division-specific information would be displayed at the extended profile level. The Account Summary window, as the main window in Wintouch, provides a snapshot of the most widely utilized information regarding the account along with tools for drilling down to more detailed, division-specific levels. The overview that this view-only window provides information from the account, contact, and account-contact profiles, as well as summaries of information stored at the extended profile level, and the next scheduled and last completed activities. The Account Summary window is the main window from which to navigate an account in Wintouch. From this window, you can use menu or toolbar options to access contact-specific information, drill down to to the Extended Profile level, and/or access URL Scripts, 5250 Terminal Emulation Sessions, and Schedule or Complete Activities.
Customize the Account Summary window to get the picture of your accounts that best suits your company's needs. You choose the fields you want to display and how you want them displayed. Add fields from the account, contact, and account-contact profiles. Color-code fields to indicate what type of information they contain: e.g. make information from the Account, Account-Contact, and Contact Profiles different colors to indicate the profile where they are located or color-code fields as marketing, accounting, and/or sales information. The Account Summary window can be customized by account type, allowing you to diplay different information based on whether an account is a distributor or customer, etc. Some information will be too detailed for the Account Summary Screen. For instance, it might make sense to display year-to-date sales and month-to-date sales on the Account Summary screen, but individual orders would have to be displayed separately in an extended profile.
Note: Ask your Wintouch Administrator to add any fields you would like displayed on the Account Summary window.
Prev: If you have opened this account from a list (e.g. an activities calendar or an account listing window), use this button to close the current record and open the previous account from the list.
Next: If you have opened this account from a list (e.g. an activities calendar or an account listing window), use this button to close the current record and open the next account from the list.
Parent: This push button will open a list of Parent accounts associated with the active account.
Note: If the Parent button is dimmed, there are no related accounts to access.
Child: This push button will open a list of Child accounts associated with the active account.
Note: If the Child button is dimmed, there are no related accounts to access.
Customize: Use this button to add, delete, arrange, and define the properties of fields in the active window.
Refresh: Press this button to refresh the Account Summary window.
Proximity Search: Select this button to launch the Proximity Search feature. This feature will display accounts within a defined radius relative to the account in which the button was selected.
Account Dashboard: Opens the Account Dashboard.
Close: Use this button to close the Account Summary window.
Help: Displays online help for the active window.
The Account Summary window can be accessed using either Account Search or one of the Activities Calendars.
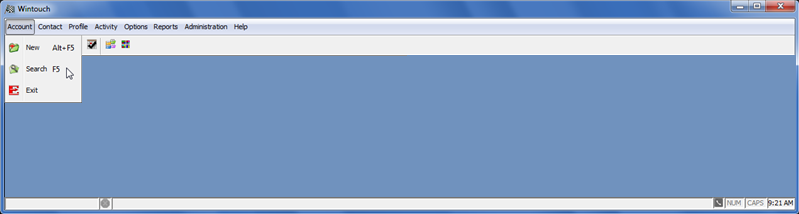
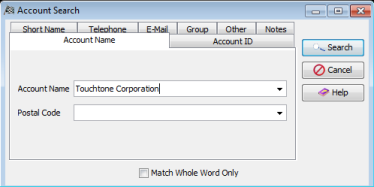
1. Accessing the Account Summary using the Account Search Function
Under the main Account menu, select Search. Click on the tab representing the search criteria you wish to use, then enter/selet the search value(s) in the field(s). If only one account matches the search criteria, the Account Summary will open automatically. If more than one result is found, a list of accounts will be returned. Double-click on the account to open the Account Summary window.

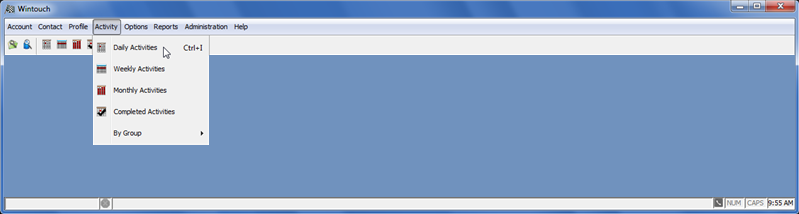
2. Accessing the Account Summary from one of the Activities Calendars.
The Account Summary can be opened from any of the 4 Activity windows. There are 4 Activity windows; Daily, Weekly, Monthly, and Completed Activities. These Activity windows can be accessed from the Main Desktop by selecting Activity from the menu, followed by one of the four Activity window selections.
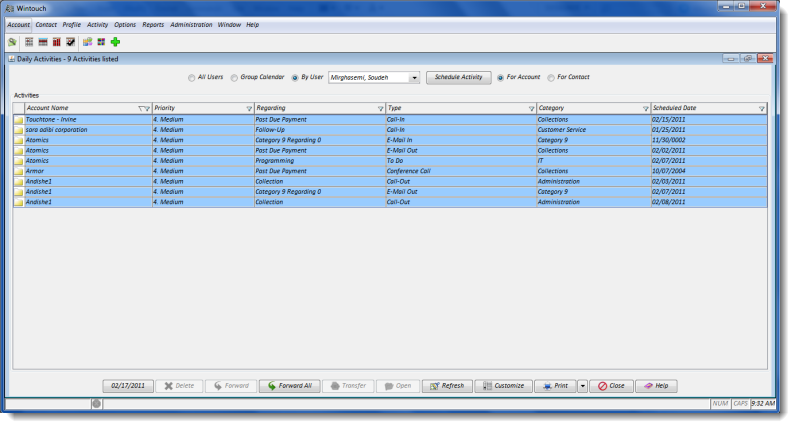
Note:The Account Summary window will only open if the scheduled activity was done from the Account Level. If the activity was done from a Contact Profile, the Contact Profile will open.
With this feature you can display Account Summary fields in pie chart or bar graph view using the Chart feature.
Follow this Link: To Learn More About Account Summary Chart Feature
Only one contact at a time is displayed in the Account Summary window. Wintouch uses the information available to select the contact most likely to be relevant to your account inquiry. If you access the Account Summary window via a contact-related item, e.g. an activity tied to a contact or an account-contact level report or a contact's account relationship listing window, Wintouch will display the related contact. If you access the Account Summary window via an item not related to any contact, e.g. an account search or an account-related report listing, Wintouch will display a contact based on a series of 3 defaults most likely to be relevant to what is currently happening in that account (found below in the section When ONLY the Account is known...).
When BOTH the Account and Contact are known (e.g. when opening an Account from the results listing of an Account-Contact Level Report or from an Activity that is tied to a Contact):
The related Contact will be displayed in the Account Summary window.
When ONLY the Account is known (e.g. when opening an Account from the results listing of an Account Search or an Account Level Report, or from an Activity that is not tied to any Contact):
- The Contact tied to the Next Activity will be displayed
- If there are no scheduled activities, the Contact tied to the Last Activity will be displayed
- If there are no activities for this account or if none of the activities are tied to a contact, the first Contact ever added (i.e. the Contact with the lowest ID#) that is still associated with the Account will be displayed

You can add a new contact from the Account Summary window. The contact you add in this way will be related to the active account.
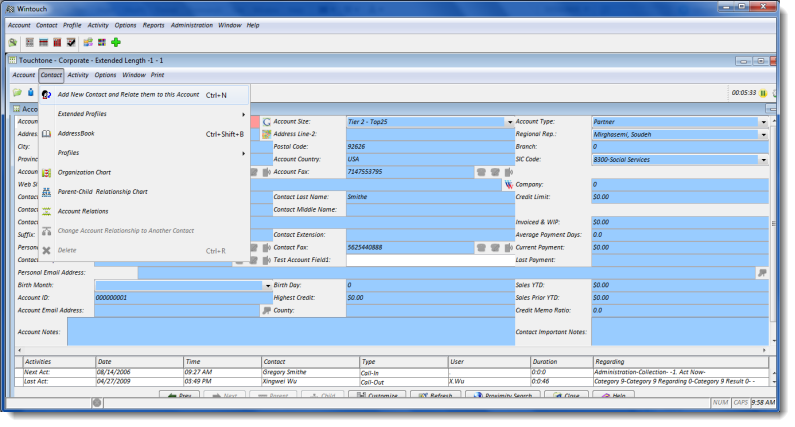
Follow this Link: To Learn More About the Add a New Contact Window
Not only does the Account Summary window provide an overview of information about the account, it also provides tools that enable you to populate fields in internet searches and out going mails. The value that will be used to populate internet and email fields when you use these field-associated icons, will be the field value to the left of the icon. To enter or edit information in any of these fields, use the appropriate Profile window.
Google Search Icon: Click on the Google Search icon to launch a browser session and run a Google search of the Account Name displayed in the Account Summary window.
MapQuest Icon: Click on the Mapquest icon to open a browser session and obtain a MapQuest map of the Address displayed in the Account Summary Window.
Web Site: Click on the Web Site icon to launch a new browser session and go to the web site address displayed in the Account Summary Window.
Email icons: Click on the Email icon to launch your e-mail client, and open a Compose screen with the To: field populated by the email address in the adjacent field.
Make Phone Call Icon: Click on the Phone Call icon to make a phone call using the phone system you have selected in your Preference settings.
Make Phone Call and Complete and Activity Icon: Click on this icon to make a phone call and complete an activity. The activity window will open while the phone call is being made.
Send SMS Text Message and Text to Speech Icon:. Click on this icon to send SMS Text or Text to Speech messages.
A maximum of 215 characters of the Account or Contact Notes will be displayed in the Account Summary window. To view the complete notes in a pop-up window, right-click anywhere in the Account or Contact Notes field and view the notes in the pop up box. If the pop up box requires more space for longer notes a scroll bar will appear in the right portion of the pop up box. To close the pop-up notes, click anywhere outside of the window.
Note: The Account and Contact Notes fields can contain a maximum of 16,340 characters. Of those, only the first 215 characters will be displayed in the Account Summary window so that this window loads quickly.
The bottom portion of this window shows the account's last completed activity and next scheduled activity, with specific information such as Date, Contact, Type, User, and Regarding. By double-clicking on an activity displayed in this box, you will open its Activity window, where you may view or edit the information.
Opening a Document Attached to an Activity


Completing an Activity from the Activity List Box
There are two options for completing an activity from the Activity List box.


Viewing the Activity Notes from the Activity List Box
To view all of the notes for the activity, right-click on the row and use the scroll bar at the right as necessary.

This feature allows the user to select up to four other windows to open with the Account Summary window by default. The user has the ability to set by default a size for each window according to a percentage value that is available within the window space. For example, the user may want the Contact List window to open as a default in the Account Summary Default Layout. The user can establish a percentage value of 80% for the Account Summary and 20% for the Contact Listing. The resulting default layout will use these values to fill the available space for the windows to be viewed.
Follow this Link: For detailed instructions and an example of how to establish an Account Desktop Default Layout.
This feature allows the user to select listings from multiple extended profiles in the Account Desktop Default Layout Feature, and pull data from fields within those profiles to be displayed in a pre defined template that can be used to send as an email or print as a letter.
Follow this Link: For instructions and examples of how to use the Combined Template Feature.
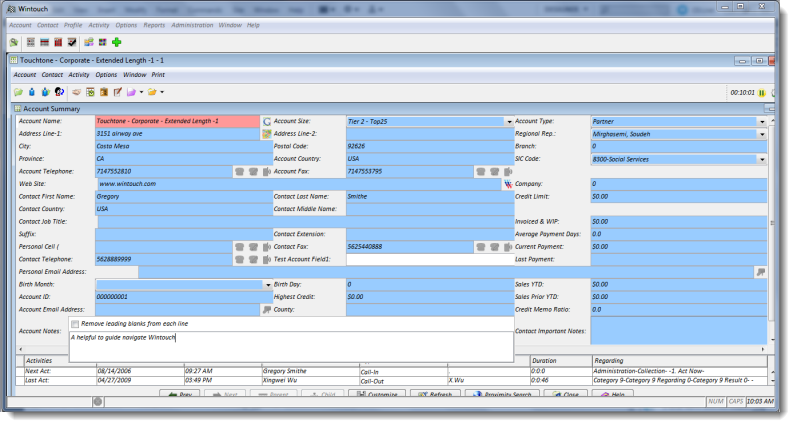
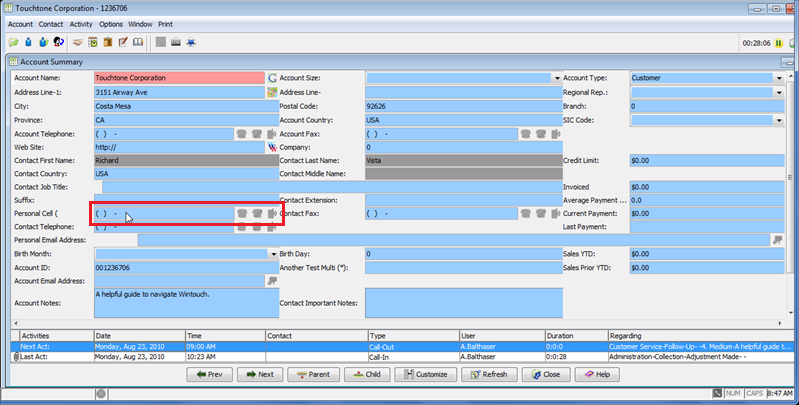
On site editing is a useful feature that allows the user to make quick and easy changes in the Account Summary without having to open the corresponding profile window of the field that is being edited. If a user is entering a large amount of account information it would be beneficial to open the Account Profile and do so from there, however in many instances, a user may only want to edit a single field while conducting other activities, and especially for this purpose, this feature can prove to be very useful.
Example:
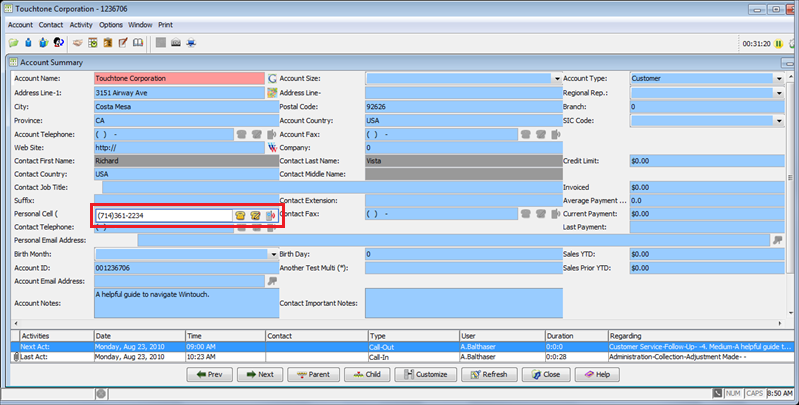
Lets imagine the user is on the phone with a customer while the user is viewing the customers Account Summary and the user wants to edit the account phone number. Rather than having to open the Account Profile and edit the phone number field, the user can do this using the onsite editing feature. The phone number field we will be editing is highlighted in the red square below.
Note: There are some rules that apply to the feature. They are as follows.
Onsite Editing Keyboard Commands
Onsite Editing Keyboard Commands (Notes Fields)