Account / Contact Desktop Default Layout Feature
This feature allows the user to select up to four other windows to open with the Account or Contact Summary window by default. The customization is specified for the desired Account Type. The user has the ability to set by default a size for each window according to a percentage value that is available within the window space. For example, the user may want the Contact List window to open as a default in the Account Summary Default Layout. The user can establish a percentage value of 80% for the Account Summary and 20% for the Contact Listing. The resulting default layout will use these values to fill the available space for the windows to be viewed.
Example
For this example we will be setting the default layout in the Account Summary. Of course the same method applies for the Contact Summary. Lets imagine the user wants to have the Contact List and the extended profile, Incident Log, open as a default in the Account Summary Default Layout. In this example we will show step by step instructions on how to create these circumstances in Wintouch.
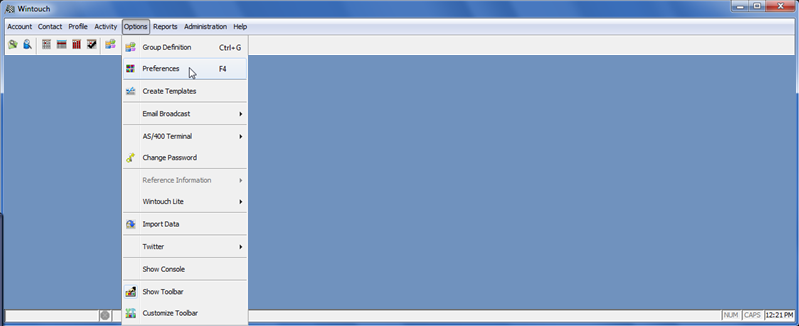
- Go to the Main Desktop Menu and select Options from the pull-down menu, then Preferences.
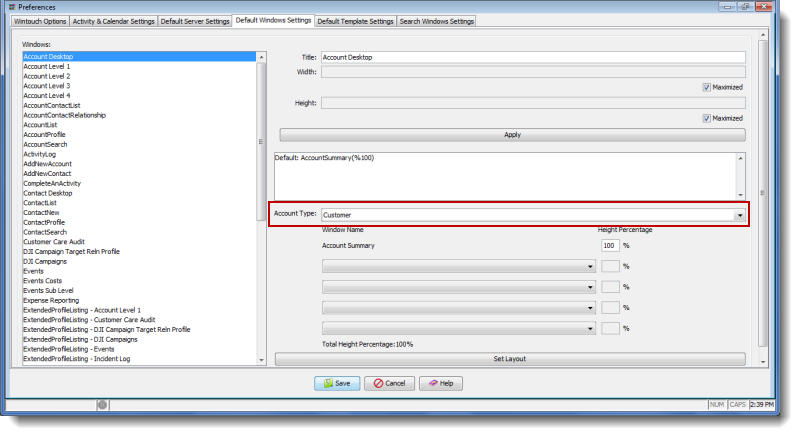
- In the Preferences window select the Default Window Settings tab.
- As seen in the below example, in the Windows pane to the left, highlight the selection Account Desktop or Contact Desktop if setting the default for the Contact Summary. When you do that you will see the corresponding adjustment fields appear to the right.
Note: Notice in the below image there is a field titled Account Summary, that has 100%, as a current percentage value. This value indicates the percentage of total window space the Account Summary will occupy when it is opened. Also notice at the bottom of the window there is a Percentage Summary that currently says Total Height Percentage: 100%. This value is a calculated sum of the total percentages that is entered in all the adjustment fields. For example, if I open one of the drop-down boxes and add an extended profile with a field percent value of 20%, the Total Height Percentage will change to Total Height Percentage: 120%. This of course will not work. Any adjustments that are made in the Height Percentage value fields must always total a sum of 100% in the Total Height Percentage.

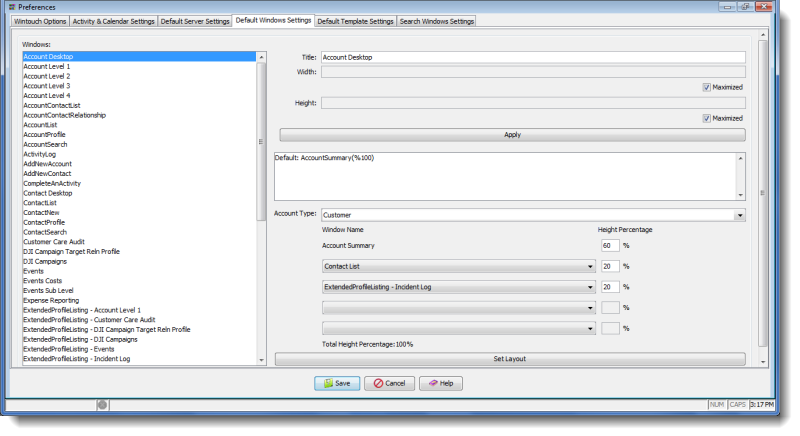
- Now select an account type from the Account Type drop-down box.
- Click on the Account Summary Height Percentage value and change it to 60%, and select the extended profile Contact List from the first drop-down box, and enter 20% in it's Height Percentage value field. Notice the calculated sum equals Total Height Percentage:80%. At this point we know we have a 20% window size remaining that can be applied to one of the existing window settings or applied to another added window setting.

- Select the extended profile Incident Log from the second drop-down box, and enter 20% in it's Height Percentage value field. This will accommodate the remaining 20%. Notice the calculated sum equals Total Height Percentage:100% .
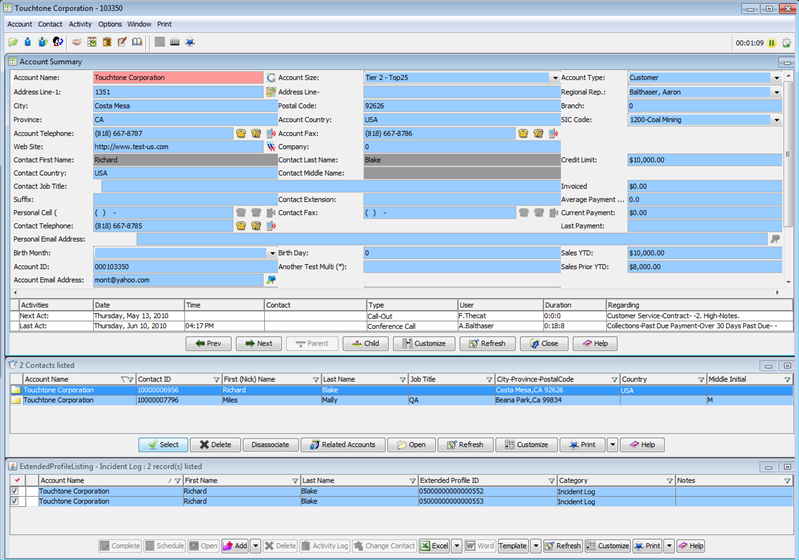
- Select the Save button and apply the changes and then open an Account Summary window to see the changes. See the image below to view the resulting window.