
Combined Template Feature
This feature allows the user to select listings from multiple extended profiles in the Account Desktop Default Layout Feature, and pull data from fields within those profiles to be displayed in a pre-defined template that can be used to send as an email or print as a letter.
Note: This feature does not function with the Contact List window when it is included in the Account Desktop Default Layout.
Window Map
The Template button has an Arrow button that when selected, gives the user two options to chose from. Definitions of these options are explained below.
- Put Selected rows into tables: This feature allows you to select multiple listings from multiple extended profiles that are selected in the Default Layout and populates the fields in a template with the corresponding data. This template can then be used to print letters or send emails.
- Create a page for each row:
- This feature can be used to select multiple rows within a single profile and populate a template with the corresponding data from the selected fields, while separating each listing on a page of its own.
- This feature can also be used to select a single listing from each profile in the Default Layout and populate the fields selected for the template with the corresponding data. The template can then be used to print a letter of send an email.

Combined Template Feature (Examples)
Put Selected Rows into a Table
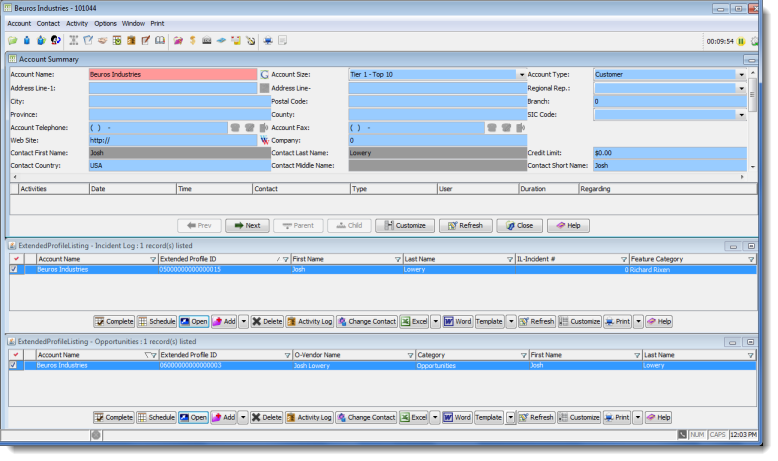
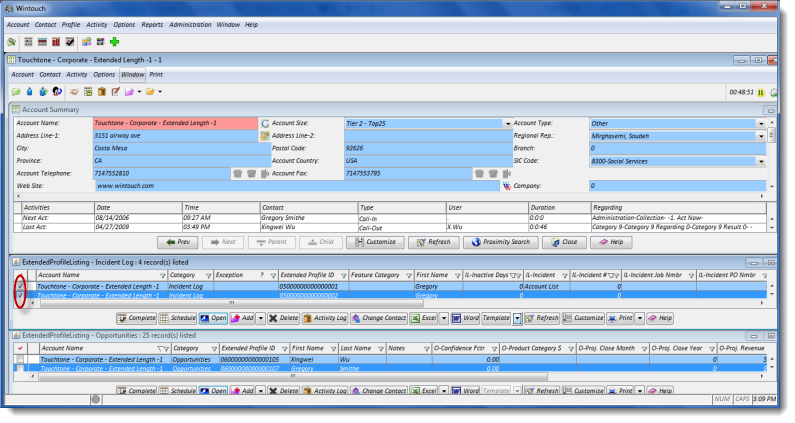
In the following example we will pull data from multiple listings within two extended profiles. The Account Desktop Default Layout has been set in Preferences to display the Incident Log and Opportunities extended profiles when the Account Summary of any account is opened. We can populate selected fields in a template corresponding to the fields within the extended profiles.
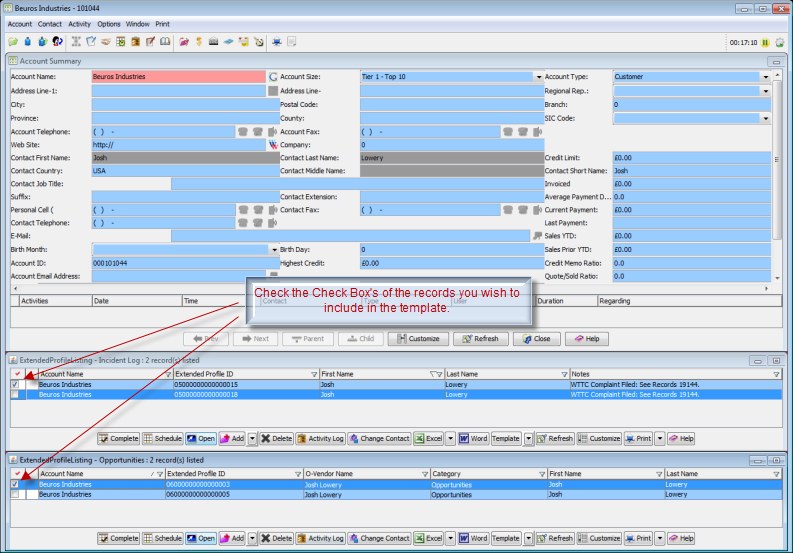
1.Check the check boxes of the records you wish to include in the template.
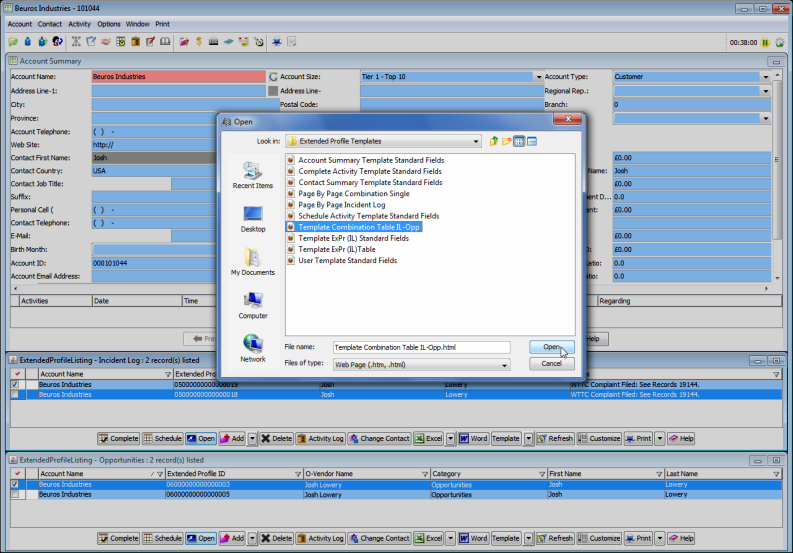
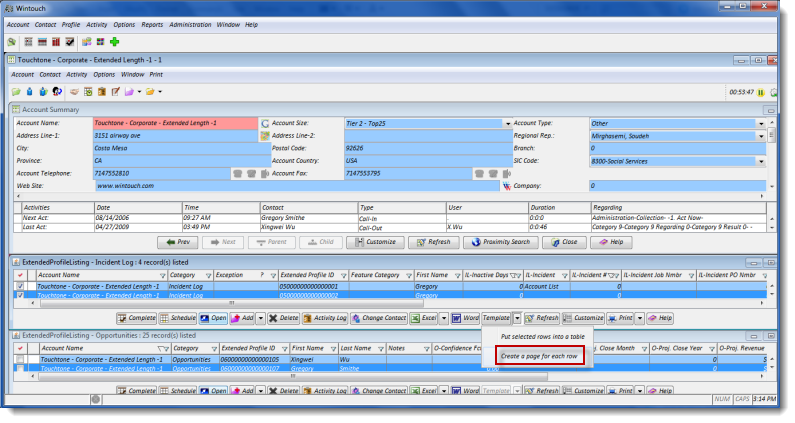
2.Select the Arrow button next to the Template button, and then select Put Selected Rows in a Table from the drop-down menu.

3.When the file browser opens browse to the location to which you have saved your pre-defined template and open the template.
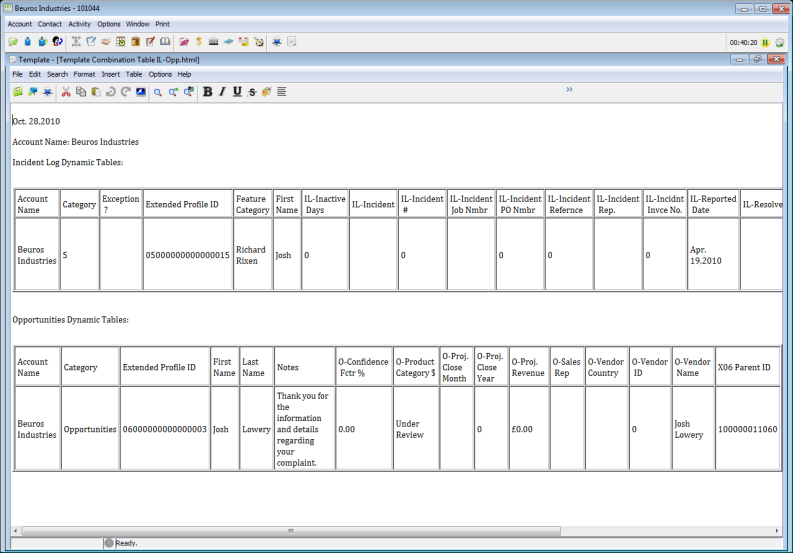
4.The template builder will open displaying the template you selected. This particular template is displaying the data from the records we selected in a dynamic table. From here we can either print the data displayed to a PDF or from a printer, or we can include this template in an email.
5.The template builder will open displaying the template you selected. This particular template is displaying the data from the records we selected in two pages.
Create a Page from Each Row (of the Incident Log)
1.Check the check boxes of the records From the Incident Log that you wish to include in the template.
2.Select the Arrow button next to the Template button, and then select Create a page for each row from the drop-down menu.
3.When the file browser opens browse to the location to which you have saved your pre-defined template and open the template.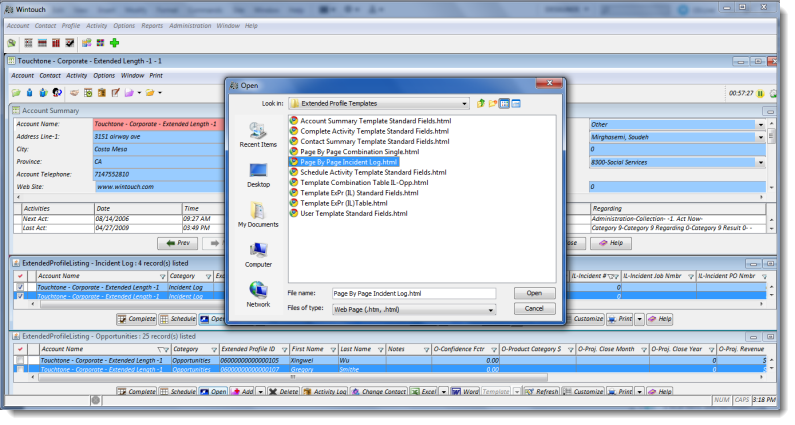
4.The template builder will open displaying the template you selected. This particular template is displaying the data from the records we selected in two pages since just two of the boxes were selected.
