I.  Mail Merge with Word using the Wintouch Letter Button
II. Mail Merge with Word without using the Wintouch Letter Button

I. Mail Merge with Word using the Wintouch Letter Button

This help section assumes that you have already installed the Wintouch Macro, created the Wintouch Button, and assigned a Word Template Directory. If you have not yet done so, follow the instructions found in the links below:

Creating your Word 2003 template.

Note: When finished, save the template to the Word Template Path you created. See How to Assign the Word Template Directory for instructions if you have not already done so.

Instructions

  1. Determine which Wintouch fields you would like to include in your template.


  2. If no Extended Profile fields will be included in your template, open the Account Summary window and Click on the Letter icon.


  3. Note:  The only fields available to you will be those in the Active Window. The Active Window is the window you are currently in within Wintouch. Thus, if you wish to include Extended Profile fields in your template, then you will need to open the appropriate Extended Profile from the Account Summary Window, thus making it the Active Window, before clicking the Letter icon.


  4. In the Open File box, Press the Cancel button.


  5. In the Microsoft Visual Basic box, Press the End button to open an empty Microsoft Word document.


  6. In Wintouch, Click the Wintouch Letter button. See How to Create the Wintouch Button in Microsoft Word for instructions if you have not already created it.


  7. Press the Insert Merge Field button to insert Wintouch fields into your template.


  8. When finished, Save your template to the Template Path you created for easy access.

Creating your Word 2000 template.

Note: When finished, save the template to the Word Template Path you created. See How to Assign the Word Template Directory for instructions if you have not already done so.

Instructions

  1. Determine which Wintouch fields you would like to include in your template.


  2. If no Extended Profile fields are will be included in your template, open the Account Summary window and Click the Letter icon.


  3. Note:  The only fields available to you will be those in the Active Window. The Active Window is the window you are currently in within Wintouch. Thus, if you wish to include Extended Profile fields in your template, then you will need to open the appropriate Extended Profile from the Account Summary Window, thus making it the Active Window, before clicking the Letter icon.


  4. In the Open File box, Press the Cancel button.


  5. In the Microsoft Visual Basic box, Press the End button to open an empty Microsoft Word document.


  6. In Wintouch, Click the Letter button. See How to Create the Wintouch Button in Microsoft Word for instructions if you have not already created it.


  7. Press the Insert Merge Field button to insert Wintouch fields into your template.


  8. When finished, Save your template to the Template Path you created for easy access.
NAME="MailmergewithoutLetterButton"

II. Mail Merge in Microsoft Word 2000 Without the Wintouch Letter Button

When you click on the Letter icon in the Account Summary toolbar, you will be prompted to open a file. If there is a file you would like to use, select it from the appropriate location.

Instructions

  1. If you would like to create a new Mail Merge document, then Press the Cancel button in the Open File box.


  2. In the Microsoft Visual Basic box, Press the End button to open an empty Microsoft Word document.


  3. Under the Tools menu, Select Mail Merge from the drop-down menu.


  4. In the Mail Merge Helper box, Press the Create button, then Select Form Letters.


  5. In the Microsoft Word box, Select Active Window to use the active document window to create your template.
  6. To select your data source, Press the Get Data button, then Select Open Data Source. Then, Look in your Wintouch folder and Open wintouch.txt.


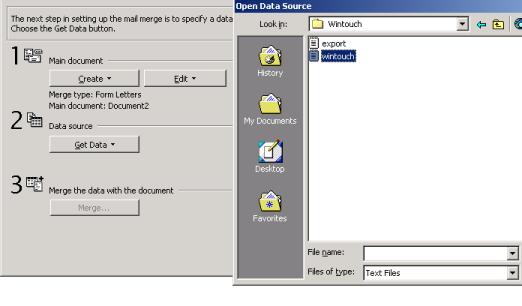
  7. Note:  You have to change the files of type: list box option to Text Files or All to see the wintouch.txt file.


  8. The following message will appear: Word found no fields in your main document. Choose the Edit Main Document button to insert merge fields into your main document. Press the Edit Main Document button.


  9. A new drop-down menu will appear in the Word toolbar.


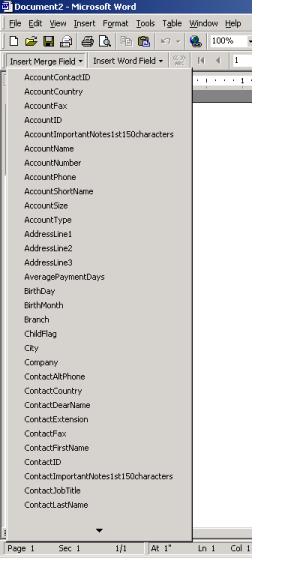
  10. Using the Insert Merge Field button: From this drop-down menu you can insert any field from the Active Window into your word document. With the cursor where you want to place the field in your document, then Select the Wintouch field you want to insert from the drop-down list. For example, if you want an account's fax number to be inserted into your document, select AccountFax from the Insert Merge Field drop-down list, and «AccountFax» will appear in your word document where the cursor was placed.

    Note:  You can view the merged data before saving by clicking on the View Merged Data button in the Word toolbar,

  11. Under the File menu, Select Save As from the drop-down menu. Be sure to save the file in the following manner:


  12. When naming your Word Template, be sure to include the Wintouch Active Window you used, the version of Microsoft Word, and the content of the form. If you choose your own order, remember to keep the three components.

    The following Word Template Name would represent a Mail Merge taken from the Account Summary Window using Word 2000 with Account Information Specific data.

    AccountSummaryWord2000Account

    Note:  Keep the name to 30 characters or less if you would like to save it using the Integrated File System on the AS/400.