
Reports
Information stored in Wintouch, such as account names and addresses, can be automatically added to pre-defined fields in a text, excel, word processing file, or in an e-mail. Wintouch imports data into a primary file that you can create in text, excel, or merged in Word form. A letter can be sent or an e-mail mailed to one account or all of the accounts in a group using the Reporting Functions.
Administration Settings
Example Creating a Report
Report Manager
The Report Manager is a valuable tool that makes generating reports a breeze. This handy tool will walk you through the process of setting up a report in just a few simple steps. This manager can be accessed by selecting Reports in the Main Toolbar, then Custom Reports from the drop-down and Manage Reports from the fly-out menu.

Push Buttons
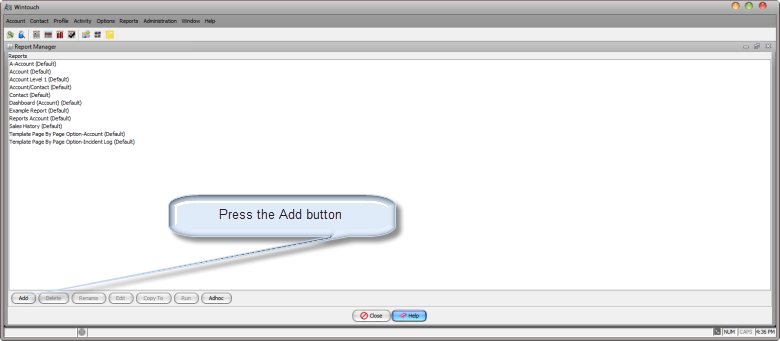
Add: Select the Add button to begin creating a custom report.
Delete: Select the Delete button to delete reports from the listing.
Rename: Press this button to give the reports another name
Edit: Selecting this button will open the report editor allowing you to make changes to the properties of the report.
Copy To: Selecting this button will open the Save As dialog allowing you to save the report to another user level.
Run: Press this button to run and view the report.
Ad-Hoc: Use this feature to create a report that will not be saved as a custom report.
Administration Settings
The administrator has the ability to control the accessibility and visibility settings for all users. This is done in the User Profile settings. There are three options available for user settings with the Reporting Tools.
- Administrator: The administrator has the ability to create custom reports that can be saved to all user levels and can view, edit, copy, or delete any existing reports.
- Unrestricted User: The unrestricted user can run adhoc reports or custom reports that are made accessible by the admin. The unrestricted user can also create custom reports at the user level.
- Restricted Users:
- Disable Reports Definition: Disallows the user from accessing the Report Manager. The user can only run custom reports made accessible by the admin.
- Disable Reports Viewing: Disallows the user from accessing any custom reports or reporting tools.
Example Creating a Report
- Select the Add button.
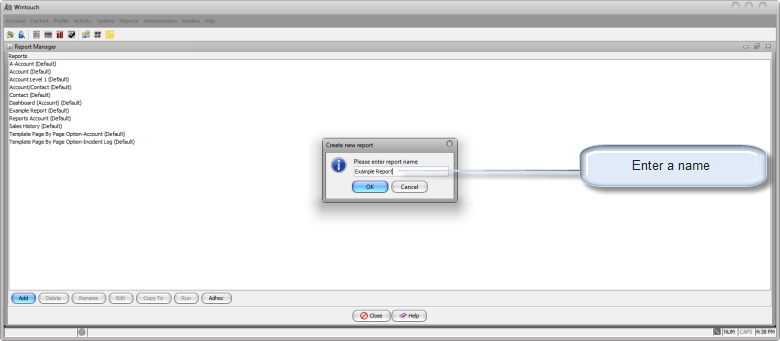
- Enter a name for the new report and press the OK button.
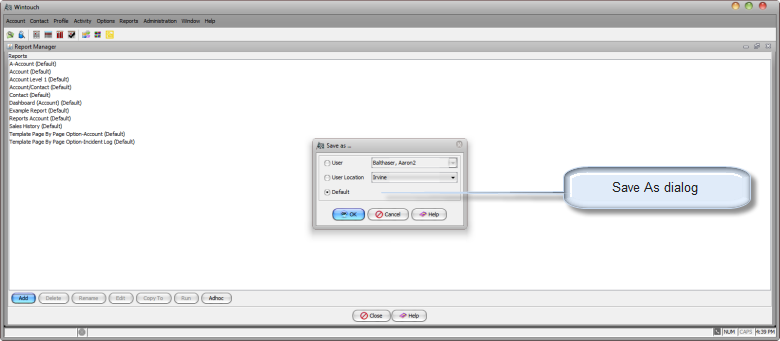
- In the Save As dialog select the user level to which you wish to save the report. This will either be the User, Location, or Default level.
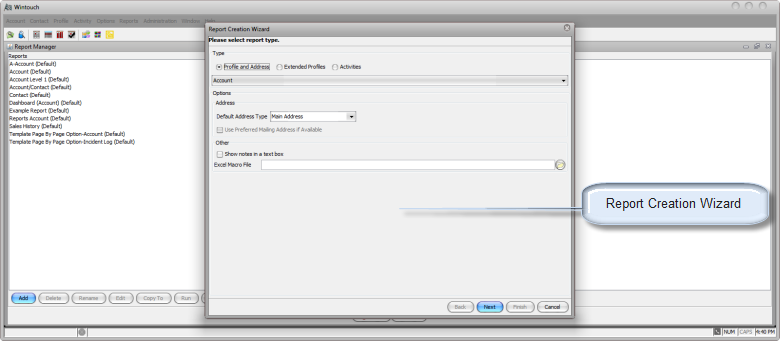
- In this window you will select some of the options that will define the report parameters. For more details on the various properties available please review Report Types . For this example we will select Profile and Address as the property that will determine the fields that will be available in the report. After you have finished making your selections in this dialog, press the Next button.
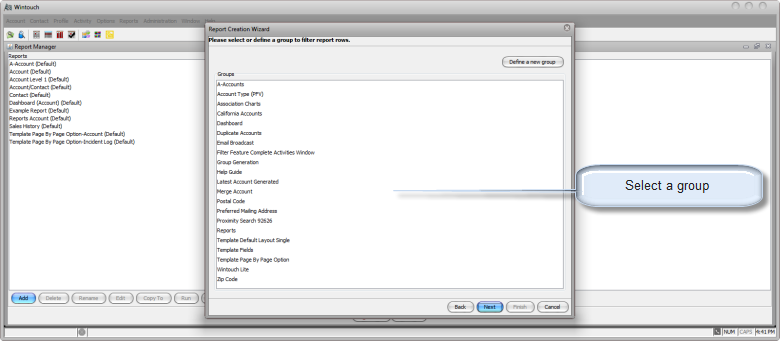
- In this dialog you will select the group that will be defining some of the additional parameters of the report. After you have selected the group for the report press the Next button. You may also define a group by selecting the Define a new group button. It is important to know that if you define a group here you must create the group using the correct user location. For example if you have defined the reports as a default level report, the group created here must also be of the default level.
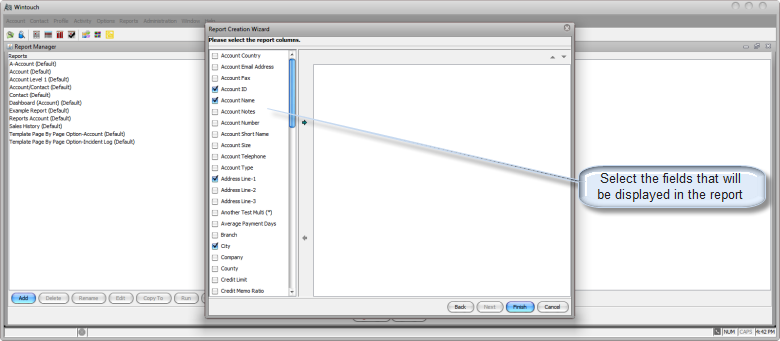
- This dialog is where we will select the Wintouch fields that will be displayed in the report. The field options that are seen here are dictated by the parameter choices we made in the previous windows. To select a field to be displayed in the report simply highlight the field and then press the arrow button that points towards the right window panel. These selections can be done one at a time or you may use the Shift or Ctrl key to select multiple items. To remove an item already selected highlight that item in the right window panel and select the arrow pointing towards the left window panel. When you are done selecting the fields you want seen in the report press the Finish button.
- After you have selected the Finish button Wintouch will automatically launch the report. Here you can see the report we have created. This report is displaying five accounts with their account name and addresses.
