Outlook Email
Setting Up Outlook Email
Using Outlook Email
With the Wintouch Outlook Email Add-in, it is possible to navigate in Wintouch from your Outlook toolbar. The Wintouch buttons on your Outlook toolbar allow you to do such things as open related customer records or add contacts in Wintouch with a single click. Incoming emails can be saved as completed activities within the related account(s) in Wintouch, with attachments stored as documents. Outgoing emails can be generated from the Wintouch Complete an Activity window, using email templates that allow insertion of data from Wintouch into the message body or subject line, thus creating consistent and professional communication from you to your customers. Email broadcasts make use of the same templates, and will be saved as completed activites within Wintouch.
Installing the Wintouch Outlook Add-In
Follow the instructions given to you by your Wintouch Support Team to install the Wintouch Outlook Add-In.
Launching Outlook from Wintouch
You can launch Outlook Email from within Wintouch with a single click of the Outlook icon on your Wintouch toolbar. The following procedure will guide you through the process of adding the Outlook icon to your Wintouch toolbar.
- Launch Wintouch.
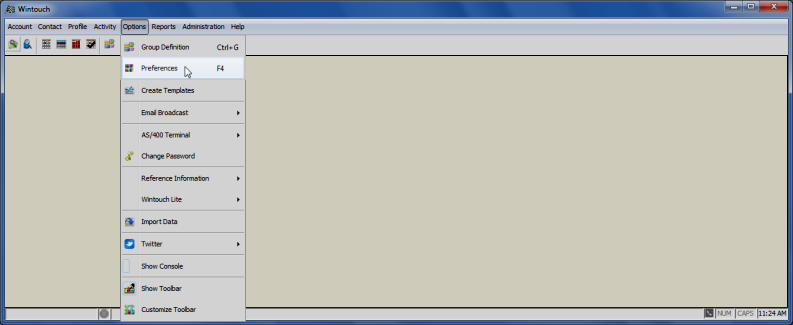
- From the Main Desktop menu select Options, then select Preferences from the drop-down menu. The Wintouch Options tab will be the default window opened.
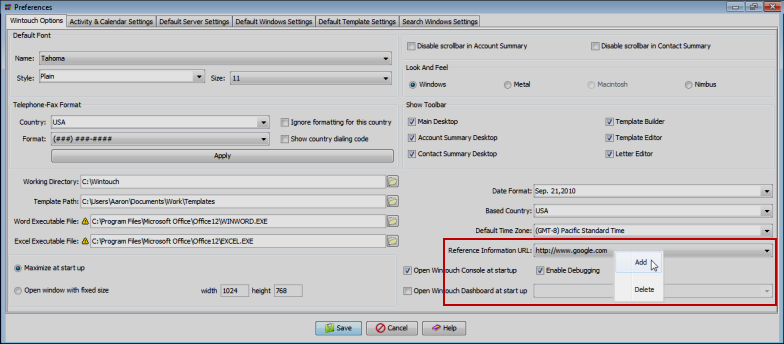
- From the Wintouch Options tab right click on the Reference Information URL field and press Add.
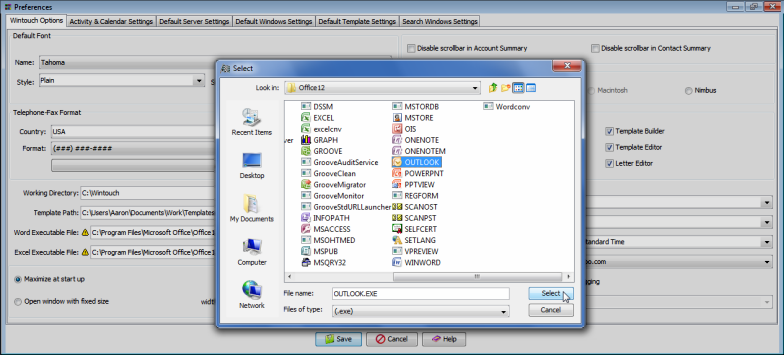
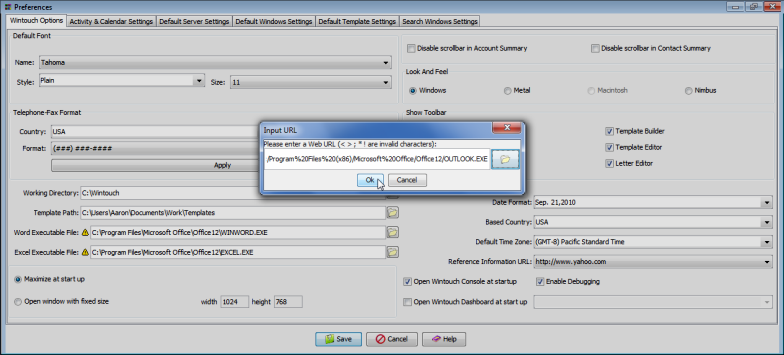
- In the Input URL window press the Folder Browser button.

-
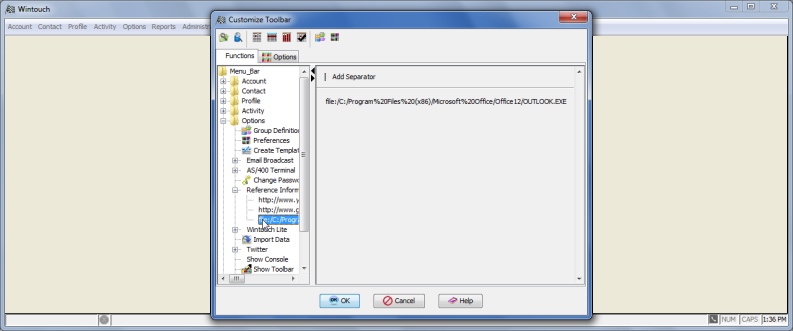
Browse to the following file file://C:\Program Files\Microsoft Office\Office12\Outlook.exe, into the Web URL field, then Press the Select button.
Note: The Reference Information URL path above is based on the default location of Microsoft Outlook. If you saved Outlook.exe in a different location, you will have to enter that path instead.
-
Press the OK button.
-
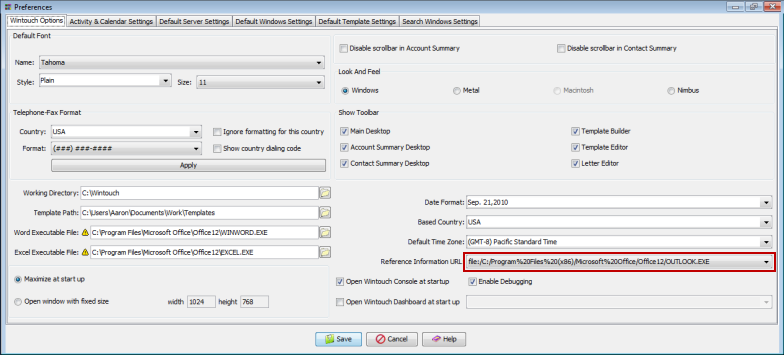
You will see the URL displayed in the Reference Information URL field. Now select the Save button.
-
Log Out of Wintouch.
- Relaunch Wintouch. The new settings should now be active.
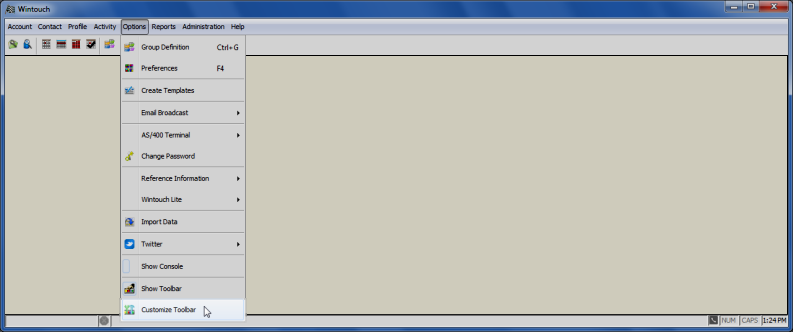
- From the Main Desktop menu select Options, then Customize Tool from the drop-down menu.
- Under Functions in the left-hand tree view, double-click to expand the Options folder.
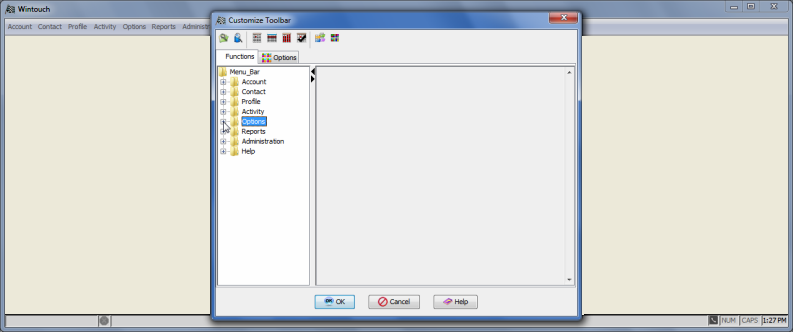
- Double-Click to expand the Reference Information menu.
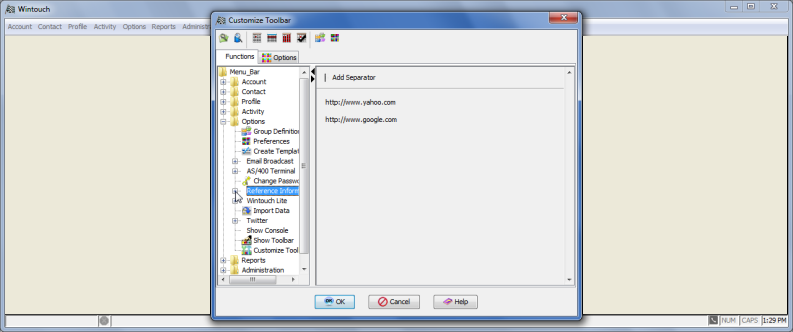
- Select the Outlook URL from the list of URL's.
-
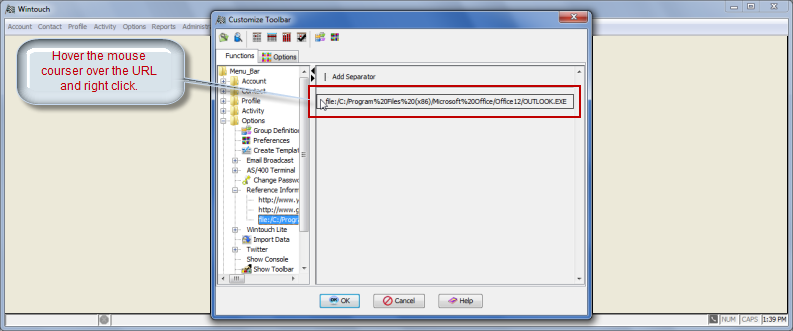
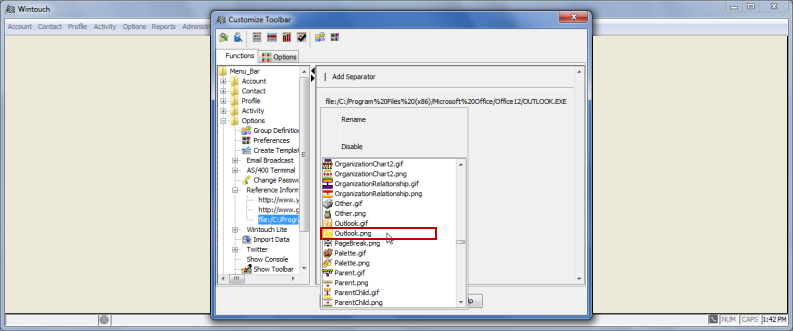
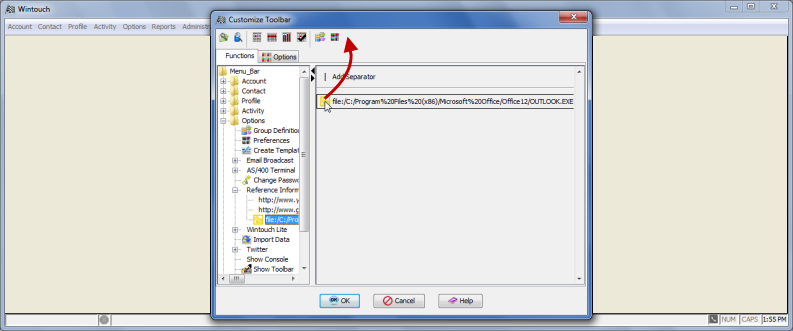
Click & Drag the Outlook icon up to the Toolbar and right click.
- In the drop-down menu scroll to the Outlook icon and click on it.
- With the mouse courser drag the icon to the location indicated by the red arrow in the image below.
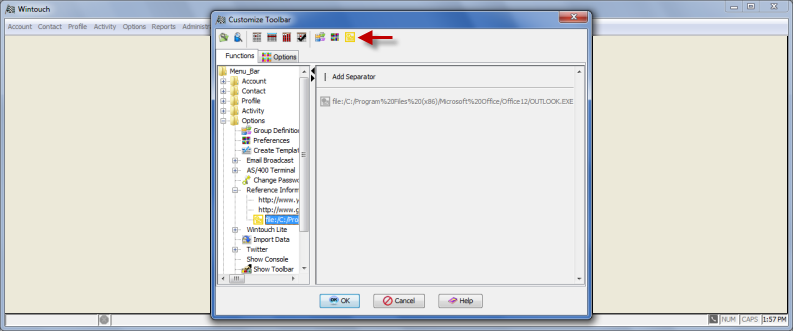
- When you are done you will see the Outlook button in the toolbar with the other toolbar buttons.
Using the Wintouch Outlook Add-In
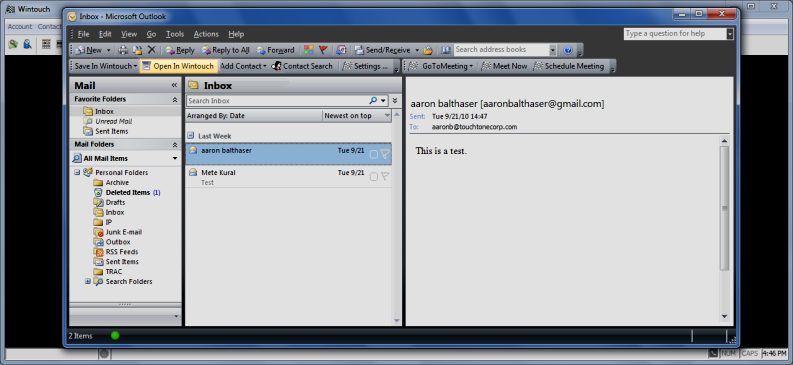
Once you have installed the Wintouch Outlook Add-in according to the instructions you received from the Wintouch Support Team, you should see the following Wintouch buttons on your Outlook toolbar. You can determine if Outlook is connected to Wintouch by the indicator in the lower left corner of the Outlook window. If the indicator is green you are connected and if it is red you are not connected.
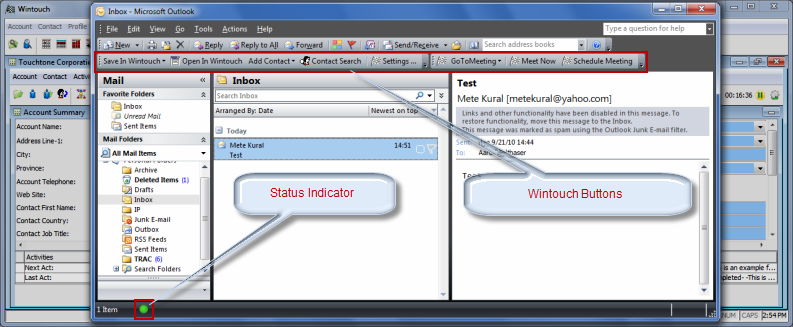
Use your new Wintouch buttons to save incoming and outgoing emails, add new contacts, and open associated accounts in Wintouch, as well as to compose emails using the Wintouch Contact Search button.
Establishing a Connection between Wintouch and Outlook
If you open Outlook using the icon on the Wintouch toolbar, the connection between the two should automatically be established. Otherwise, follow the instructions below to establish the connection.
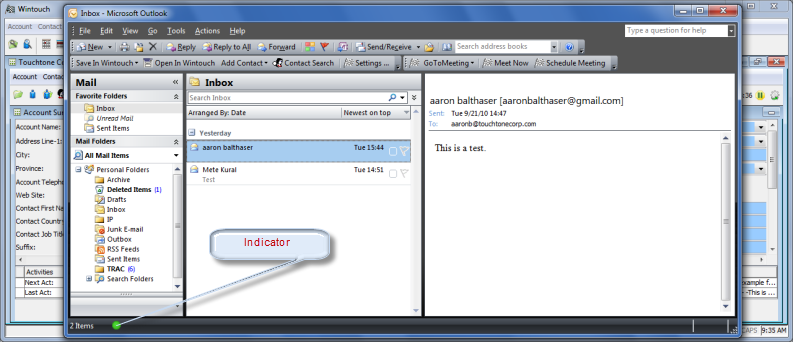
- In the following screen shot, the red light in the bottom left-hand corner of the Outlook window indicates that Outlook is NOT connected to Wintouch. To establish a connection, double-click on the red light. The light will turn green.

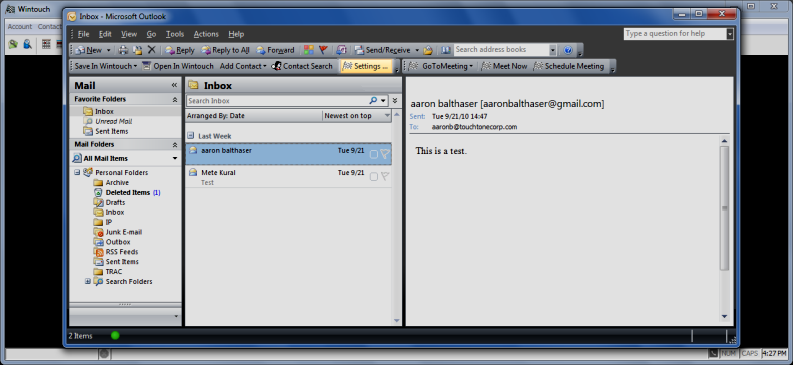
- In the following screen shot, the green light in the bottom left-hand corner of the window indicates that Outlook is connected to Wintouch.
Saving an Email as An Activity
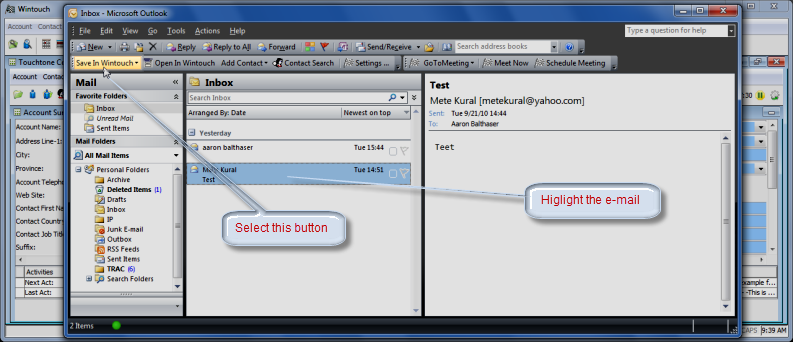
- Highlight the incoming or outgoing email you wish to save in Wintouch, then press the Save in Wintouch button. This will open the associated Account Summary window as well as a Complete a New Activity window associated with the contact who sent the email.
- Wintouch will automatically populate the Contact, Telephone, Date, Time, and Type fields. Therefore, with the exception of the Subject, the information from the email header is already stored in Wintouch. It is, therefore, best to highlight and delete the header, except the subject line, from the Notes section. Next, select field values for Category, Regarding, and Result.
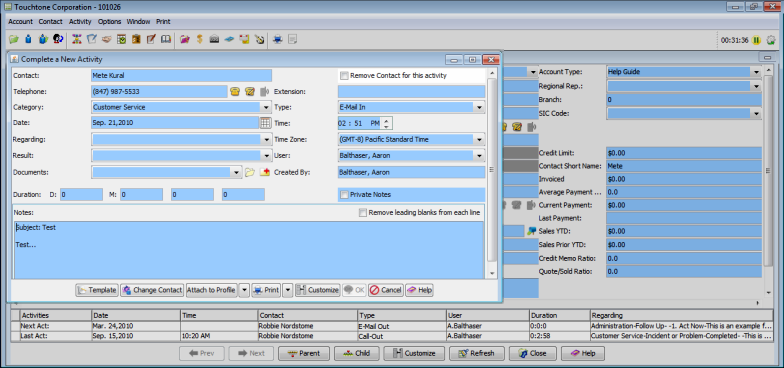
- Press the OK button.
Automatically Saving All Outgoing Email to Wintouch
You can change your settings to save all outgoing email to Wintouch using the Wintouch Settings button.
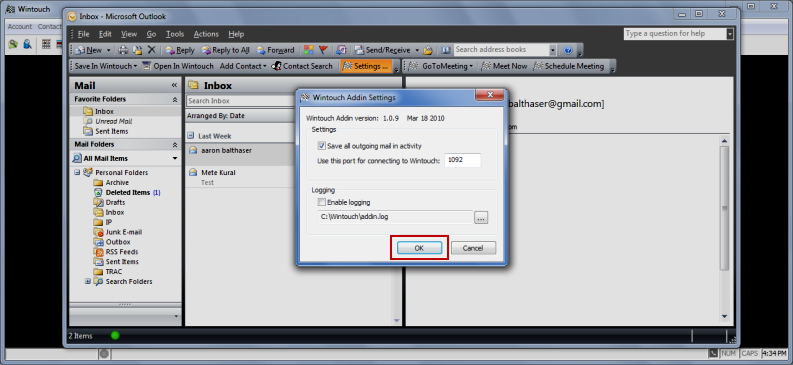
- Select the Settings button.
- Check the Save all outgoing mail in activity box, then select the OK button.
Now, all outgoing emails should be saved to the associated account in Wintouch.
Opening the Wintouch Account Associated with an Outlook Email
For any sent or received email, you can open the associated Account Summary window using the Open in Wintouch button.
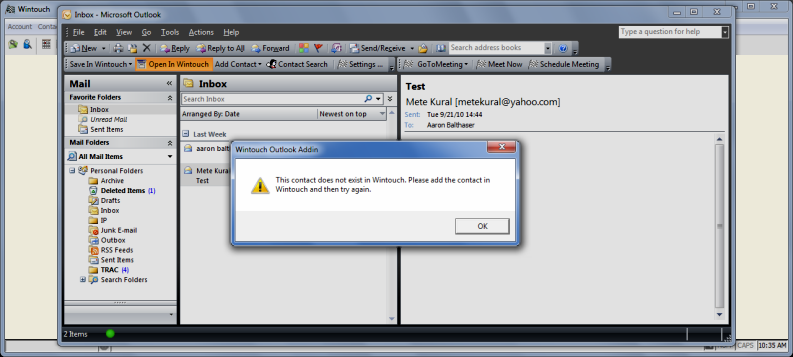
- Highlight the email associated with the Account/Contact you wish to open in Wintouch, then press the Open in Wintouch button.
- If no contact is found with the email address, you will receive the following message:
- If a contact is found, who is not tied to any account, the Contact Summary window will open automatically.
- If a contact with the email address is found, who is not tied to any acount, the associated Account Summary window will open automatically.
- If a contact with the email address is found, who is tied to only one account, the associated Account Summary window will open automatically with the related contact displayed.
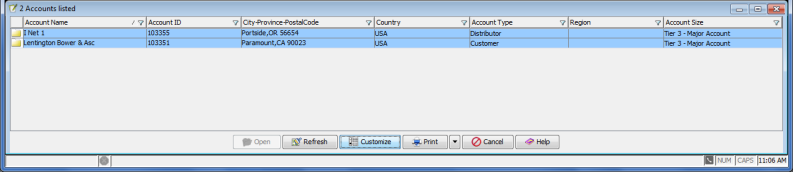
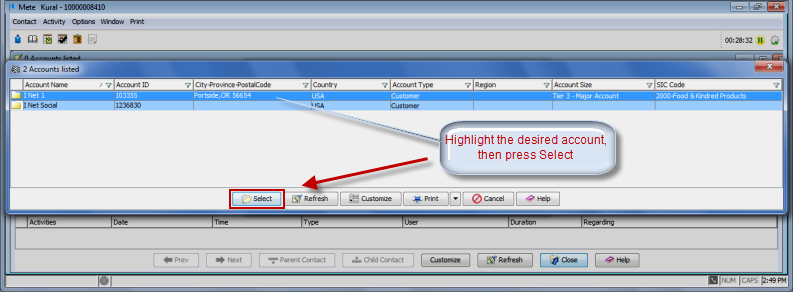
- If there is only one contact with that email address, and s/he is associated with multiple accounts, then Wintouch will return a window containing a list of account/contact pairs. Highlight to select the correct account/contact pair from the list, then press the Open button.
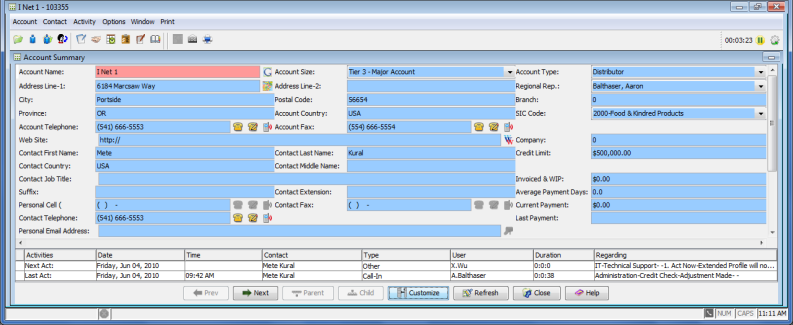
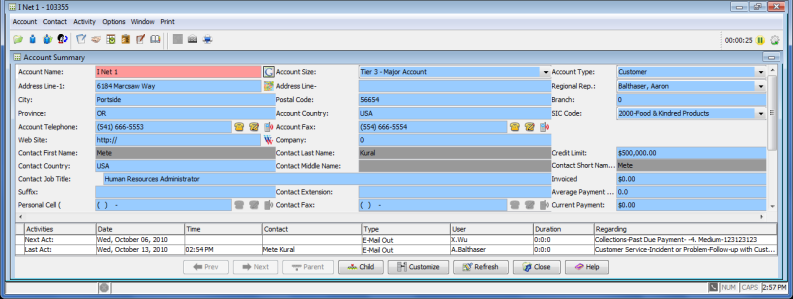
- The associated Account or Contact Summary window will now open displaying the contact associated with the incoming or outgoing email.
Adding Contacts in Wintouch from Outlook Email
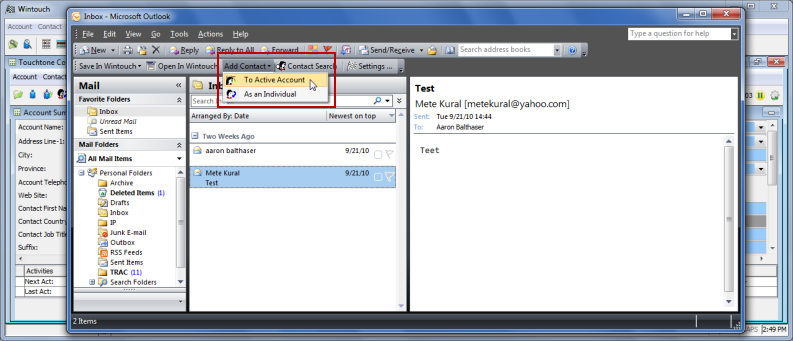
You can add the sender or recipient of any email in your account as a contact in Wintouch using the Add Contact button. You can either add the contact to the Wintouch active window, or you can add the contact as an individual, not associated with any account. Both will be demonstrated below.
Adding A Contact to the Wintouch Active Window from Outlook Email
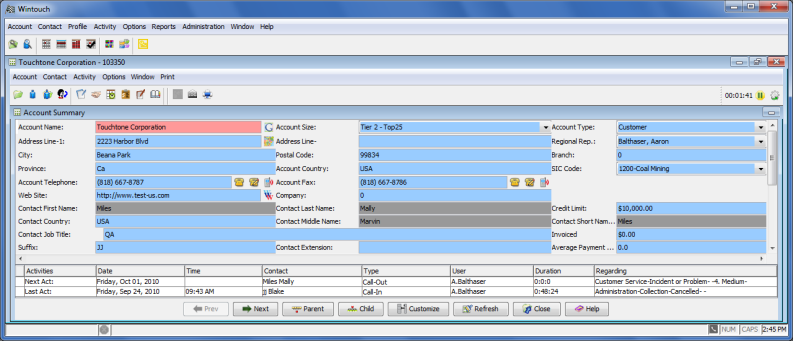
If you choose to add a contact to the Wintouch active window, you must make sure that the account that is currently active in Wintouch is the one you wish to add the contact to. The active window in Wintouch is whichever window is currently in focus. You can determine whether a window is the active window in one of two ways. First, inactive windows will have the titlebar greyed out, whereas the active window's titlebar will be your standard window color. You can also determine the active window by looking at which window has a check mark next to it's name under the Window main menu.
- In the below image, Touchtone Corporation is the active account.
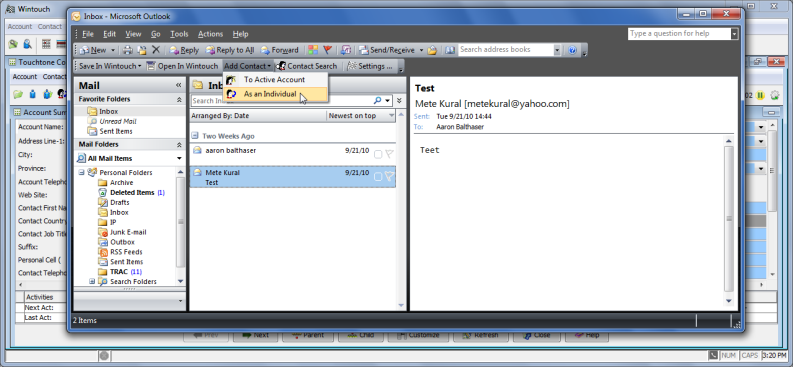
- Highlight the email sent or received by the contact you wish to save in Wintouch, then press the Add Contact button, and select To Active Account.
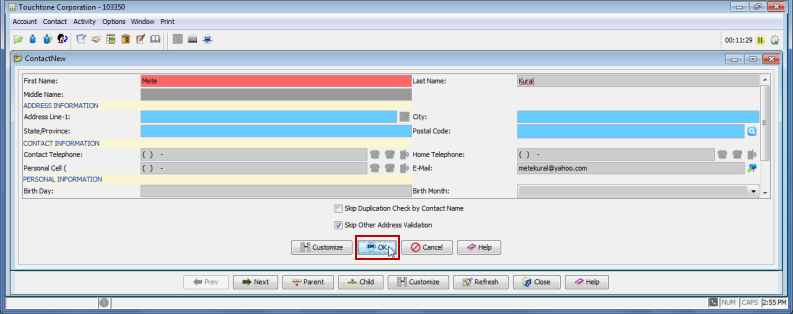
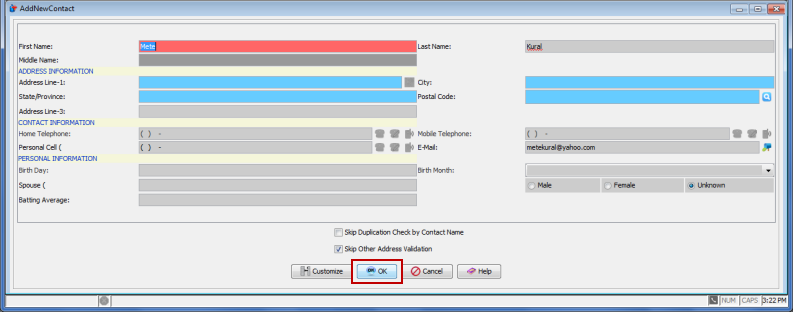
- Complete New Contact information, then press the OK button.
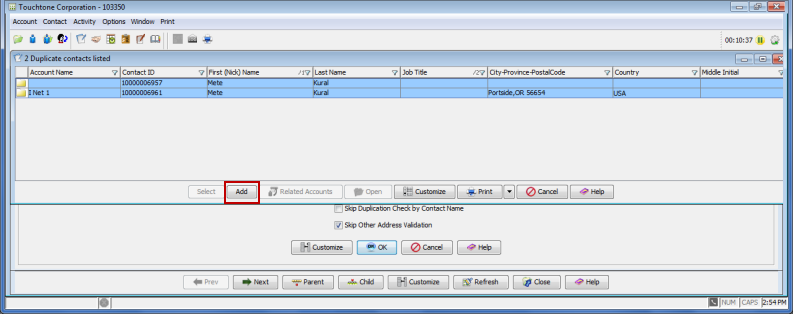
- Wintouch will now check for duplicate contacts. If the contact you are adding is not already in the system, press the Add button.
- Your new contact should now appear in the Account Summary window of the active account.

Adding A Contact to Wintouch as an Individual from Outlook Email
If you add a contact as an individual, s/he will not be associated with any account. To link your new contact to an existing account.
- Highlight the incoming email from the contact you wish to save in Wintouch, then press the Add Contact button, and select As an Individual. This will add the sender of the email as a contact in Wintouch NOT associated with an account.
- Complete New Contact information, then press the OK button.
- Wintouch will now check for duplicate contacts. If the contact you are adding is not already in the system, press the Add button.

Note: The contact you just added will NOT be associated with an account in Wintouch. To add your contact directly to an already existing account in Wintouch, see the section Adding a contact to the Wintouch Active Window from Outlook Email.
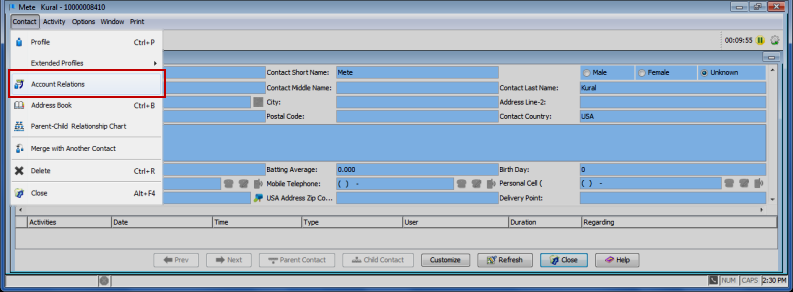
- If you would like to associate your new contact to an account after adding it from Outlook, under the Contact menu, select Account Relations.
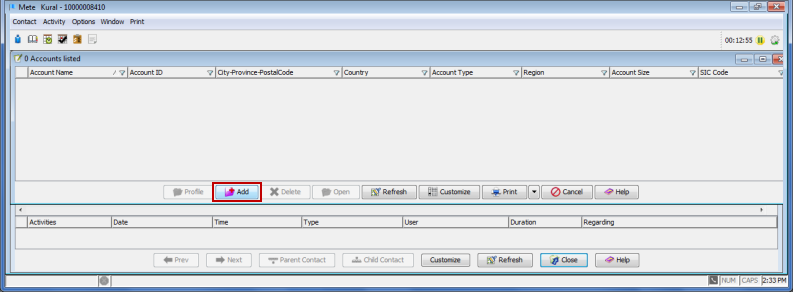
- In the Account Relations window, press the Add button to open the Account Search window.
- Click on the Account Name tab, enter the name of the account you wish to associate with this contact, then press the Search button.

- If only one account is found, the Account-Contact Relationship window will open. If a list of accounts is returned, highlight the account you wish to associate with this contact, then press the Select button.
- Complete the Account-Contact Relationship fields, then press the OK button.

- Your new contact should now appear in the Account Summary window of the associated account.
Using the Wintouch Buttons in the Compose Window of Outlook Email
Using the Wintouch Contact Search Button to Compose an Email
The connection between Outlook and Wintouch allows you to search Wintouch for the email addresses of your contacts, and insert them into outgoing emails.
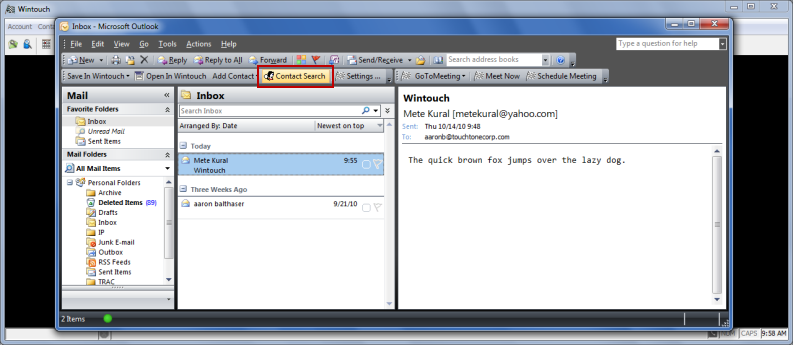
- To compose an email to one of your Wintouch contacts, press the Contact Search button either in the main Outlook window or in the Compose window.
If you press the Contact Search button in the main window when you have an email highlighted, the search window that opens will be automatically populated with the contact associated with that email. Press the OK button.
If you press the Contact Search button in the Compose window, or in the main window without an email highlighted, a blank search window will open. Enter the name and/or email address of the contact, then press OK.
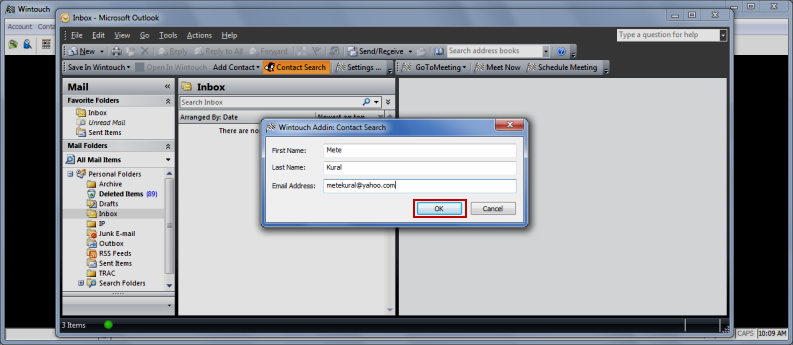
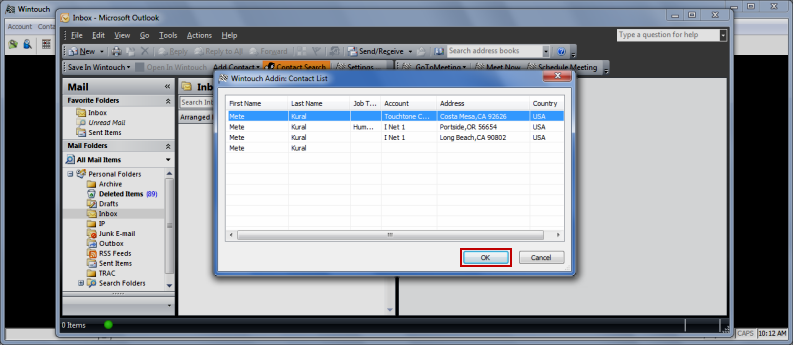
- In the Wintouch Contact Search Window, type the name of the Wintouch contact you wish to send an e-mail to, then press the OK button.
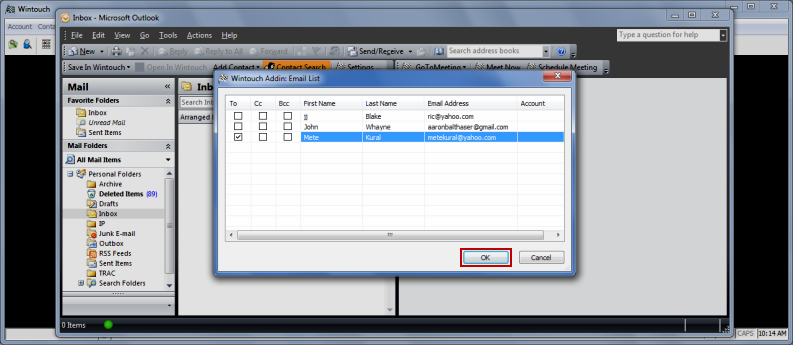
- From the Wintouch Email List, highlight and select the contact you wish to e-mail.
- Click the appropriate To:, Cc:, and Bcc: for the recipients of your email.
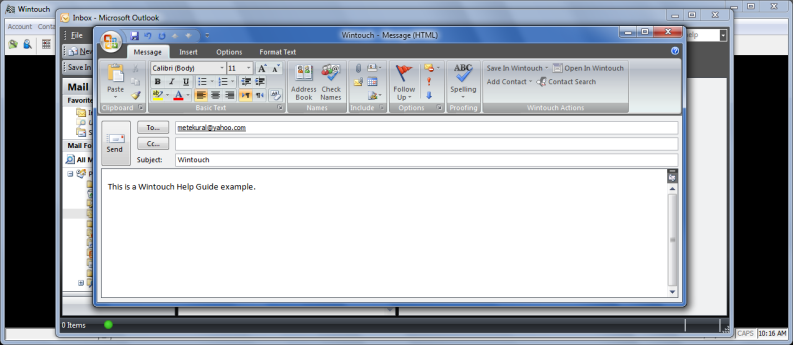
- Compose your e-mail, then press the Send button.
Saving Your Outgoing Email in Wintouch
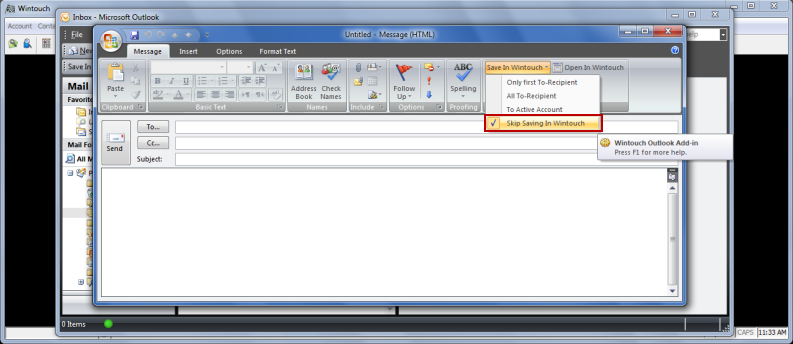
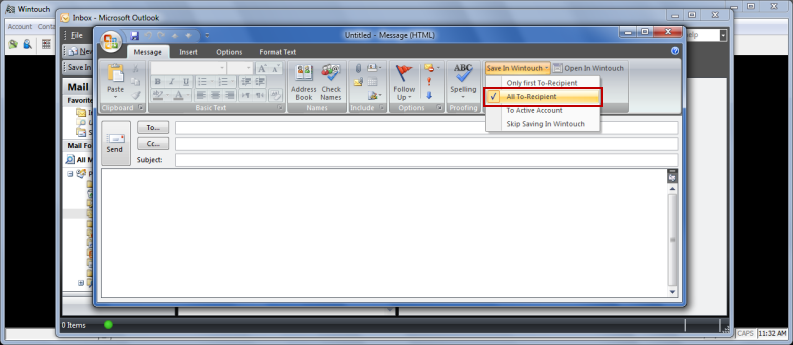
If in Settings you selected Save All Outgoing Mail in Wintouch you will be able to use the Save in Wintouch button in the Compose window to select for which contact(s) in Wintouch you want to save the email. The three options for where to save your email are: Only First To-Recipient, All To-Recipients, or you can choose to Skip Saving in Wintouch. The default setting is Only First To-Recipient.
The Only First To-Recipient Option
If you choose this option, the Account Summary window for the account associated with the first recipient listed in the email will open, as well as a Complete a New Activity window with the email in the Notes section.
- Press the Save in Wintouch button, and select Only First To-Recipient.
- Select the recipients, compose your email, then press the Send button.

- Complete the activity that opens.
The All To-Recipients Option
If you choose this option, the Account Summary window for the account associated with the first recipient listed in the email will open, as well as a Complete a New Activity window with the email in the Notes section. Once you Complete the Activity, the same will happen for the next recipient listed in the email. For each activity you complete, one for the next recipient will open until activities have been completed for all To-Recipients.
- Press the Save in Wintouch button, and select All To-Recipients.
- Select the recipients, compose your email, then press the Send button.
- Complete each activity as it opens.
The Skip Saving in Wintouch Option
If you choose this option, the email you are sending will not be saved in Wintouch.