
Lotus Notes Email Plugin
Setting Up Wintouch-Lotus Notes Email Integration
Using Lotus Notes Email
With the Wintouch Lotus Notes Email Plug-in, it is possible to navigate in Wintouch from your Lotus Notes toolbar. The Wintouch button on your Lotus Notes toolbar allows you to do such things as open related customer records or add contacts in Wintouch with a single click. Incoming emails can be saved as completed activities within the related account(s) in Wintouch, with attachments stored as documents. Outgoing emails can be generated from the Wintouch Complete an Activity window, using email templates that allow insertion of data from Wintouch into the body or subject line of the message, thus creating consistent and professional communication from you to your customers. Email broadcasts make use of the same templates, and will be saved as completed activities within Wintouch. Click here for more information about Email Broadcasts.
Installing the Wintouch Lotus Notes Plug-In
ADMINISTRATORS
Wintouch Lotus Notes Plug-in supports version 7.x and 8.x of Lotus Notes. The following instructions are intended for the Lotus Notes/Domino Administrator, who has the authority to refresh the design of all mail databases. This installation procedure will change the design of all mail databases to include the Wintouch button. Use it to make a company-wide transition to using the Lotus Notes-Wintouch Plug-In.
After installing the Wintouch Lotus Notes Plug-In, you must select Lotus Notes as your Preferred Email Client in Wintouch Preferences to ensure the proper functioning of the Plug-in. See the section Launching Lotus Notes from Wintouch for instructions on selecting Lotus Notes as your Preferred Email Client.
Installation Procedure
- Click here to download the Wintouch-Lotus Notes Plug-in.
- Run the Wintouch Plug-in by Double-clicking on the wintouch.nsf file or opening it in Lotus Notes.
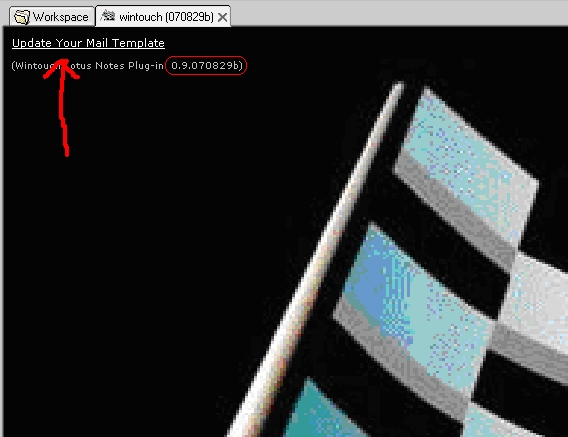
- Click on Update Your Mail Template.

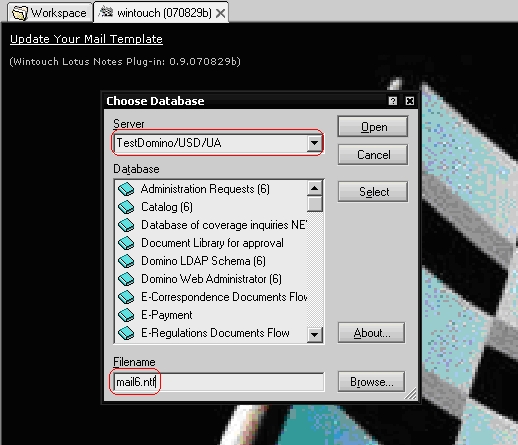
- In the Choose Database dialog box, select your server, then select your mail template. (mail7.ntf for Lotus Domino version 7.0.x and so forth). Then press the Open button.
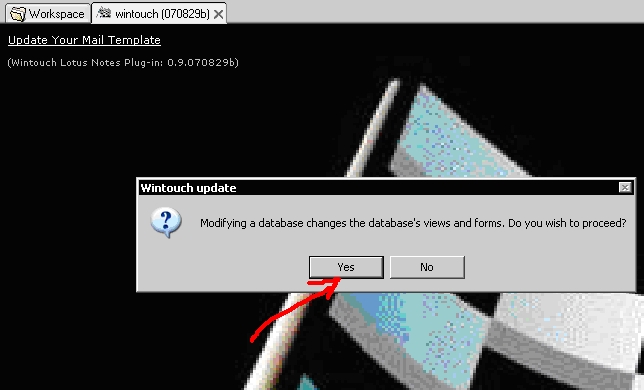
- In the Wintouch update dialog box, press the Yes button to proceed.

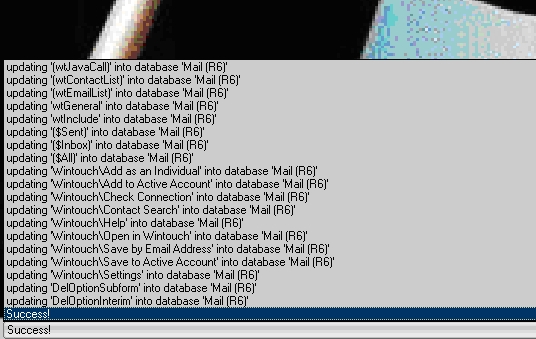
- The installation process will take a few minutes. Click on the Status Bar to check the progress.
- Once the status reads "Success!" run the Load Design command on the server consol to replace the design of all mail databases.
Adding the Wintouch Button to Your Custom Folders
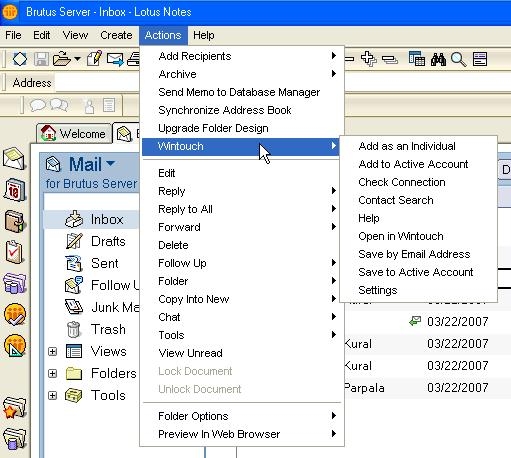
The Wintouch button will be added to any new custom folders you create. If you wish to add the Wintouch button to any of your already existing custom folders, you will have to remove them and recreate them. Alternatively, you have the option of accessing all Wintouch Plug-In features from the Actions menu.
Remove and Recreate Already Existing Custom Folders to Add the Wintouch Button
- Open your mail database.
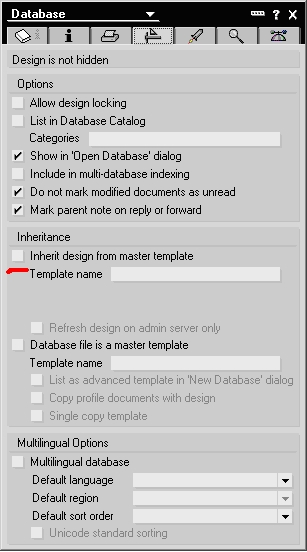
- Under the File menu, hover over Database, then select Properties.
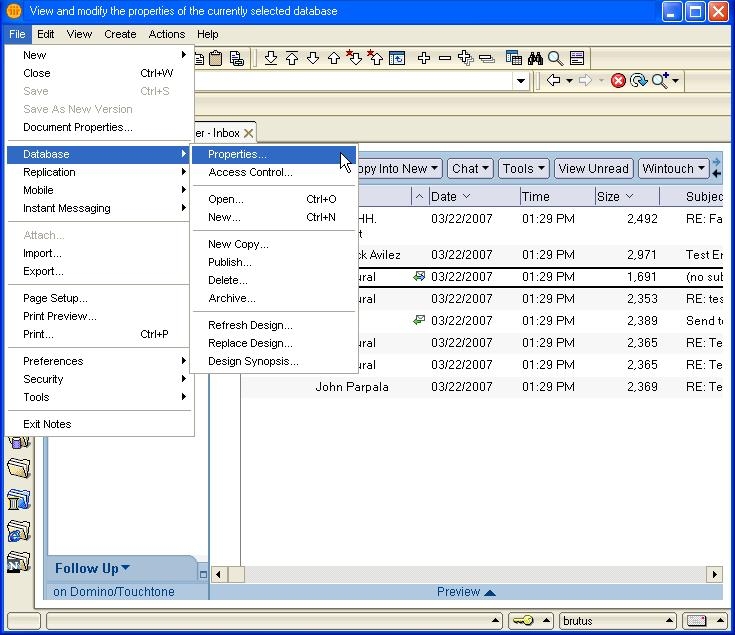
- Make sure that Inherit design from master template is unchecked.
- From any custom folders you choose not to recreate, you can access all Wintouch Plug-In features using the Actions menu.
USERS
You may find occasion to install the Lotus Notes-Wintouch Plug-In for users on an individual basis. The following procedure will accomplish this by installing the Lotus Notes-Wintouch Plug-In on the local server. Use this procedure if you goal is to conduct a trial installation of the plug-in for a limited number of users, for instance.
After installing the Wintouch Lotus Notes Plug-In, you must select Lotus Notes as your Preferred Email Client in Wintouch Preferences to ensure the proper functioning of the Plug-in. See the section Launching Lotus Notes from Wintouch for instructions on selecting Lotus Notes as your Preferred Email Client.
- Click here to download the Wintouch-Lotus Notes Plug-in.
- Run the Wintouch Plug-in by double-clicking on the wintouch.nsf file or opening it in Lotus Notes.
- Click on Update Your Mail Template.
- In the Choose Database dialog box, select Local, then select your mail template. (mail7.ntf for Lotus Domino 7.0.x and so forth). Then press the Open button.

- In the Wintouch update dialog box, press the Yes button to proceed.
- The installation process will take a few minutes. Click on the Status Bar to check the progress.
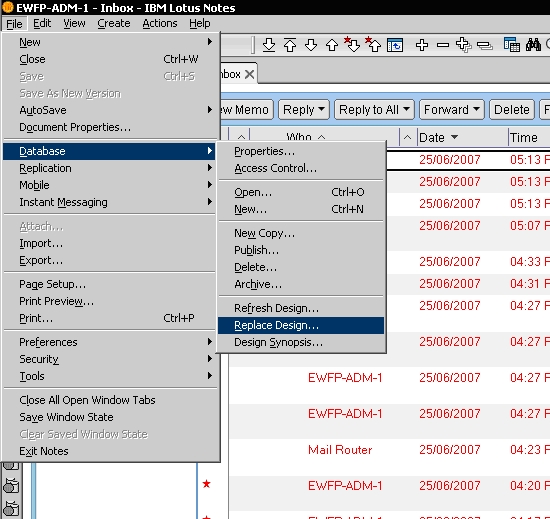
- Once the status reads "Success!" open your mail database, then select File/Database/Replace Design...

- To open your mail database, under the File menu, hover over Database, then select Replace Design.
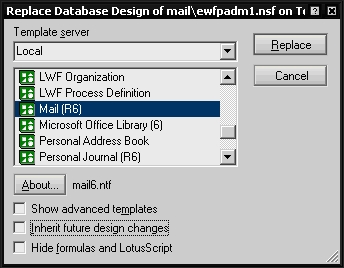
- In the Replace Database Design... dialog box, select Local, then select your mail template (this will be the same as in step 4). Then press the Replace button.
- In the Lotus Notes dialog box, press the Yes button to proceed.

Signing the Wintouch Lotus Notes Plug-In
- Go to the Files tab under UA Domain - Local

- Right click on wintouch.nsf and click sign.

- Select Active Server's ID and uncheck Update existing signatures only.

- Click OK

Launching Lotus Notes from Wintouch
You can launch Lotus Notes Email from within Wintouch with a single click of the Mailbox icon on your Wintouch toolbar. The following procedure will guide you through the process of setting up Lotus Notes Email in your Wintouch Preferences and adding the Mailbox icon icon to your Wintouch toolbar.
You can launch Outlook Email from within Wintouch with a single click of the Outlook icon on your Wintouch toolbar. The following procedure will guide you through the process of setting up Outlook Email as your Preferred Email Client in Wintouch Preferences and adding the Outlook icon to your Wintouch toolbar.
Follow the instructions given to you by your Wintouch Support Team to install the Wintouch Outlook Add-In. You must also select MS Outlook as your Preferred Email Client in Wintouch Preferences for proper functioning of the Add-In. See the next section for instructions on making MS Outlook your preferred email client.
- Launch Wintouch.
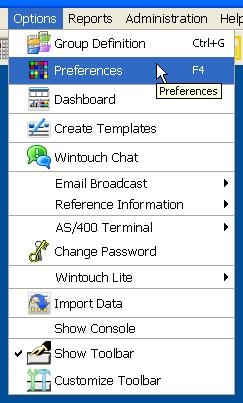
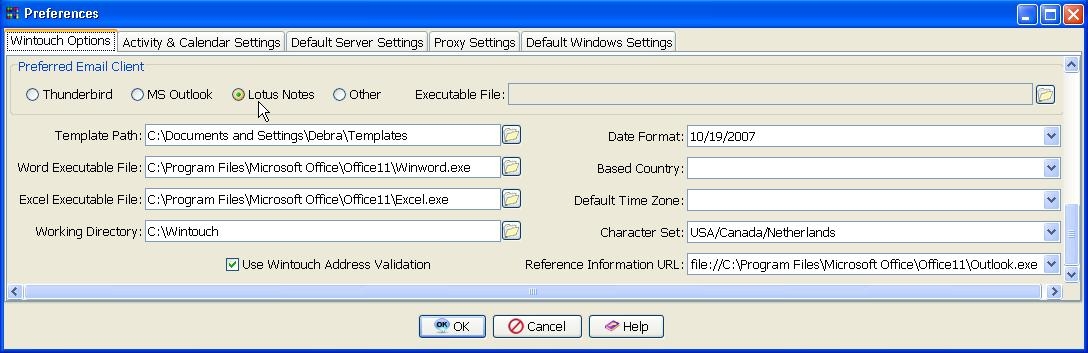
- Under the Options menu, select Preferences from the drop-down list. The Wintouch Options tab should be the active window.
- In the Preferred Email Client section, select Lotus Notes.
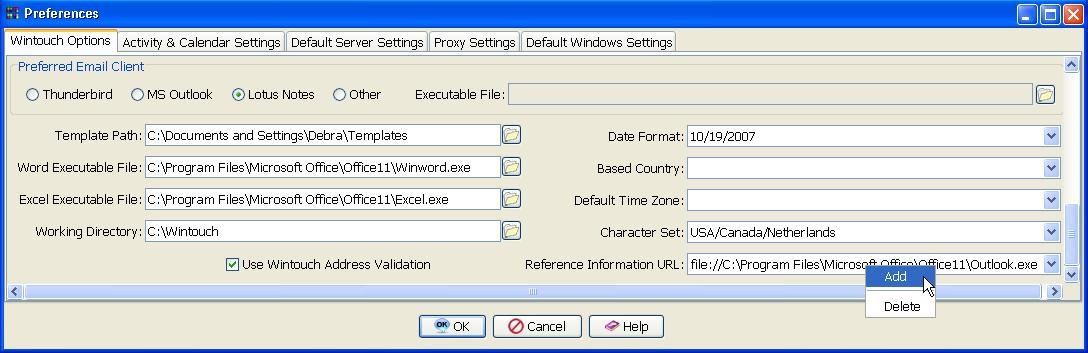
- Right-Click in the Reference Information URL field, and select Add.
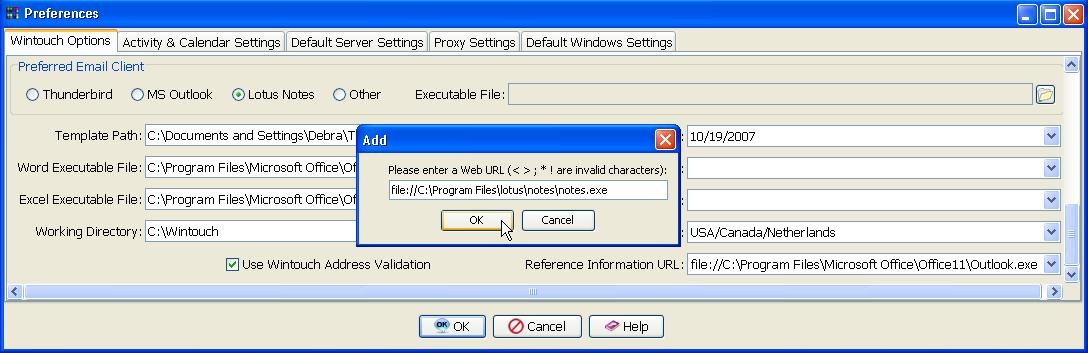
- Copy and Paste the following path, file://C:\Program Files\lotus\notes\notes.exe, into the Web URL field, then press the OK button.
Note: The Reference Information URL path above is based on the default location of Lotus Notes. If you saved notes.exe in a different location, you will have to enter that path instead.
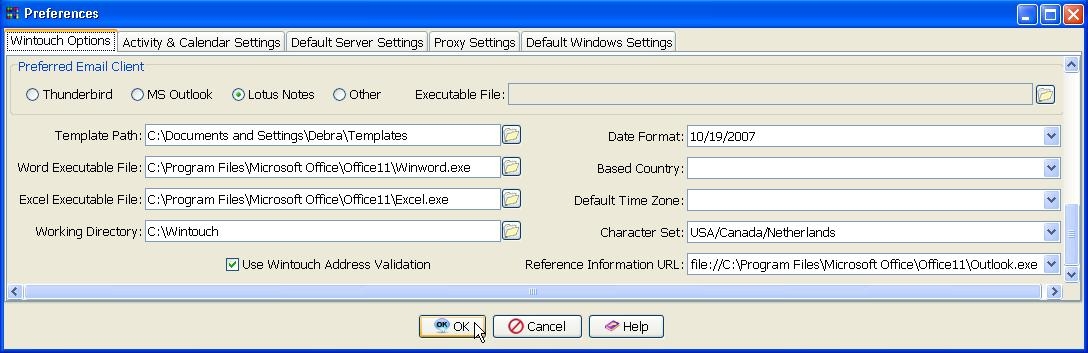
- Press the OK button.
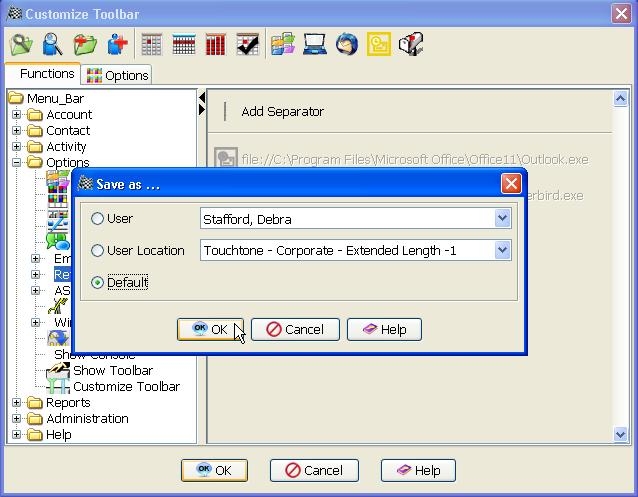
- If you are a Wintouch Administrator, and have the standard Wintouch Default Preferences for your company, Save as Default, then press OK.
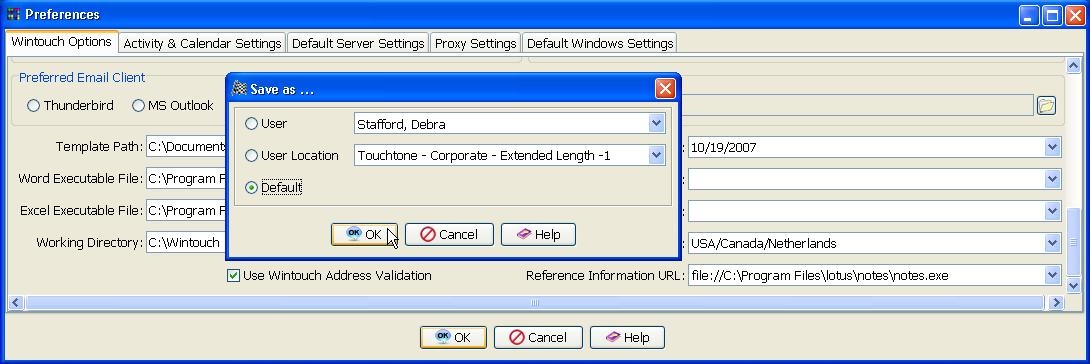
- Exit Wintouch
- Relaunch Wintouch. The new settings should now be active.
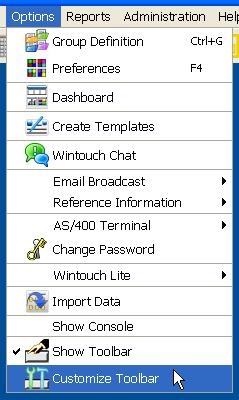
- Under the Options (Alt+P) menu, select Customize Toolbar from the drop-down list.
- Under Functions in the left-hand tree view, click to expand the Options folder.

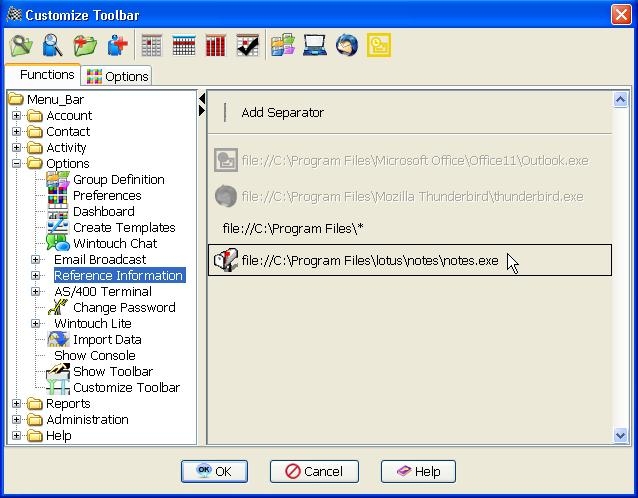
- Click to expand Reference Information in the left-hand tree view.
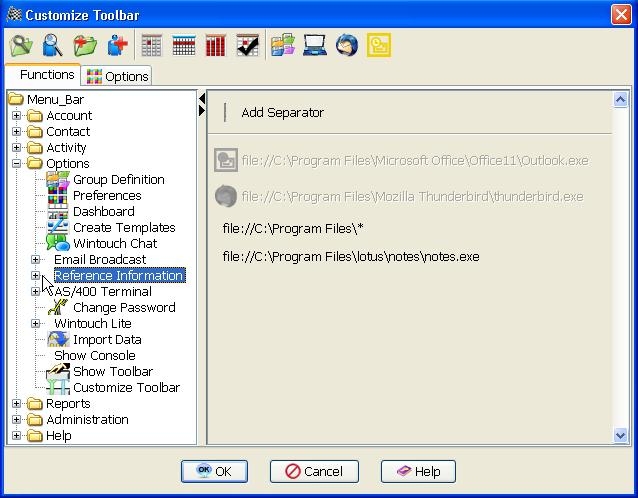
- Right-Click on file://C:\Program Files\lotus\notes\notes.exe in the right-hand list-box.
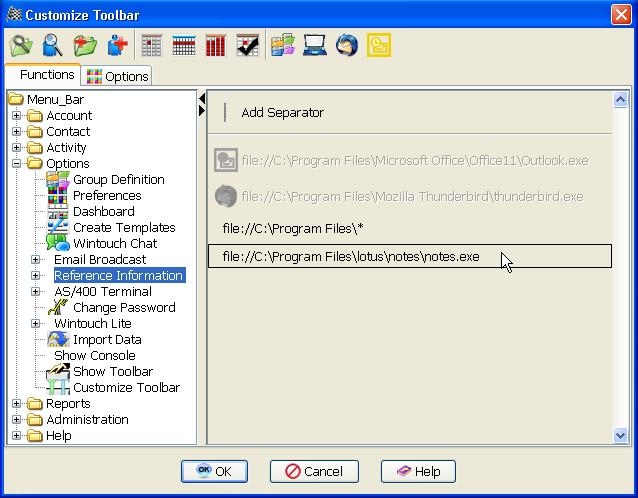
- Scroll down and select the Mail.gif icon.
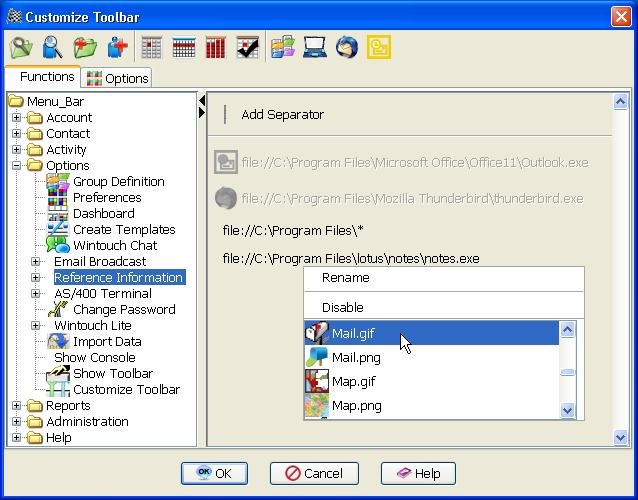
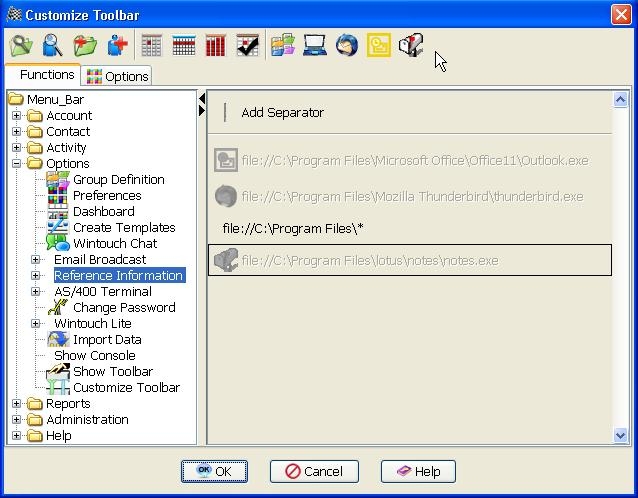
- Click & Drag the Mail.gif icon up to the Toolbar.
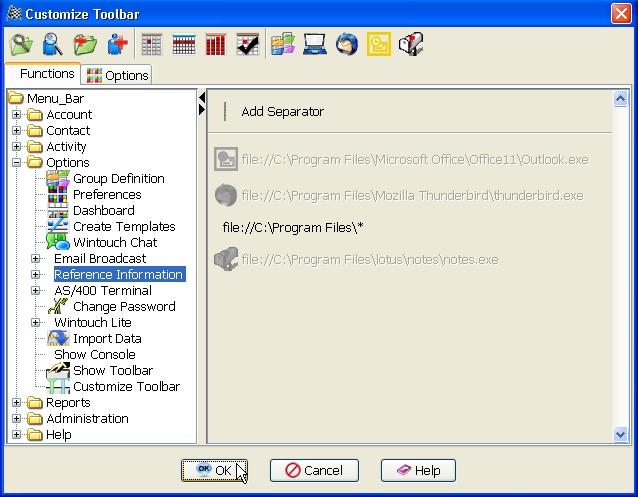
- Press the OK button.
- If you are a Wintouch Administrator, and have the standard Wintouch Default Preferences for your company, Save as Default, then press OK.
Using the Wintouch Lotus Notes Plug-In
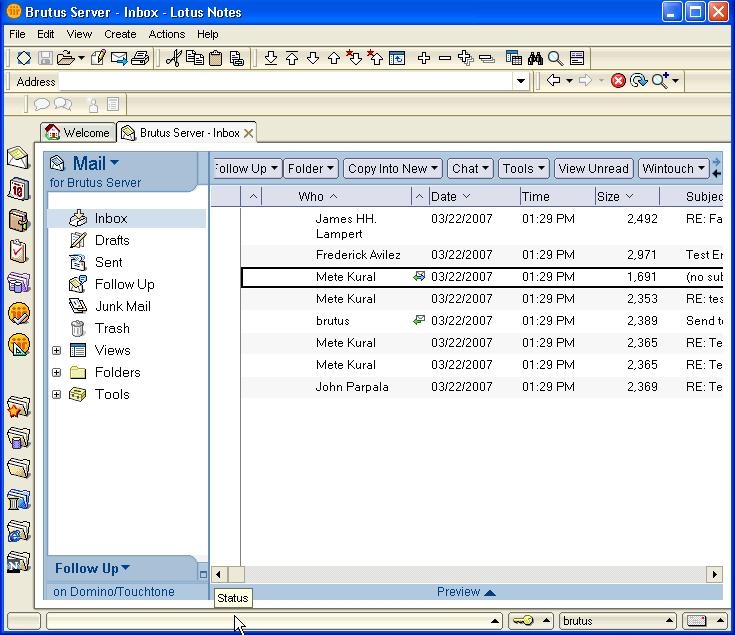
Once you have installed the Wintouch Lotus Notes Plug-in according to the instructions above, the Wintouch button will appear in your Lotus Notes mail folders:
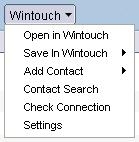
Use your new Wintouch button to save incoming and outgoing emails, add new contacts, and open associated accounts in Wintouch, as well as to compose emails using the Wintouch button Contact Search option.
Saving an Email as An Activity
You can save any incoming or outgoing email in Wintouch using the Wintouch button Save In Wintouch option. You can either save the email to the account that is currently active in Wintouch, or you can save it to a Wintouch account associated with the email address of the sender or recipient. Both will be demonstrated below.
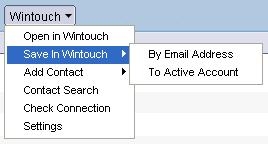
Save in Wintouch by Email Address
If you choose to save an email in Wintouch by Email Address, Wintouch will search for all Accounts and Contacts associated with that Email. If there is only one account and/or contact associated with the email address, the associated summary window will open along with a Complete An Activity window. If there is more than one account and/or contact associated with the email address, you will select the desired contact from a Contact listing window to open the summary and activity windows.
- Highlight the incoming or outgoing email you wish to save in Wintouch, press the Wintouch button, and under the Save in Wintouch select By Email Address. This will open the associated Account Summary window as well as a Complete a New Activity window associated with the contact who sent the email.

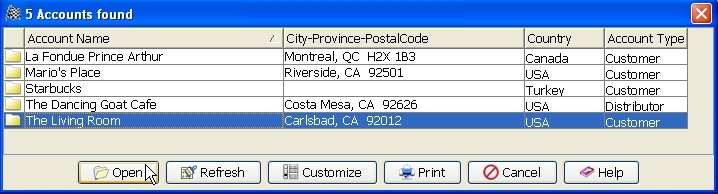
- Wintouch will return all Accounts/Contacts associated with the email address. Highlight the relevant Account/Contact, then press the Open button.
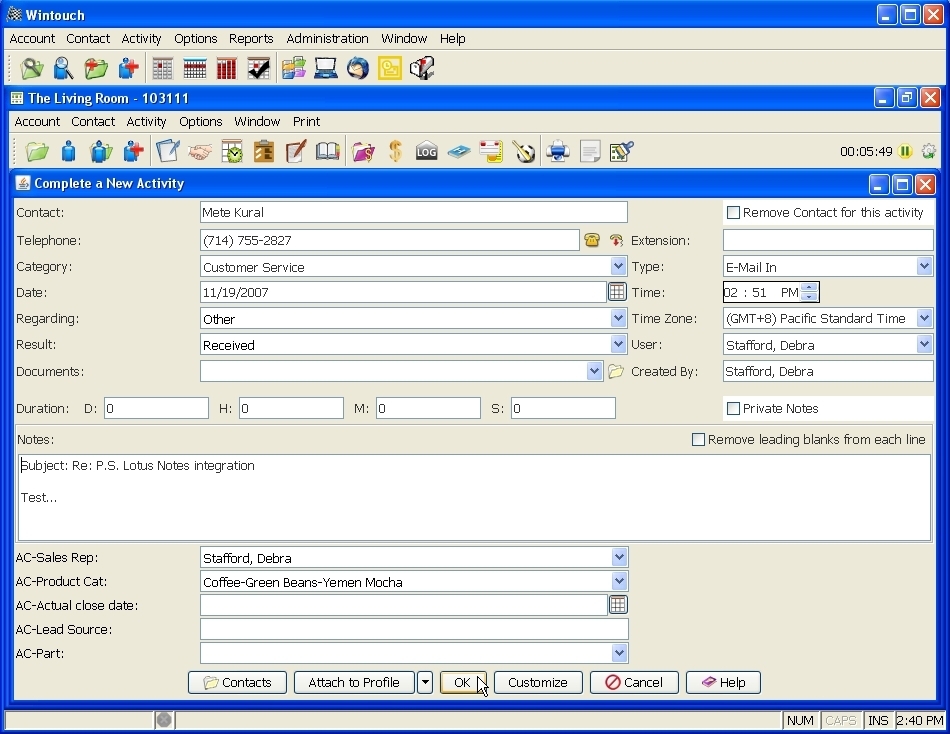
- Wintouch will automatically populate the Contact, Telephone, Date, Time, and Type fields. Therefore, with the exception of the Subject, the information from the email header is already stored in Wintouch. It is, therefore, best to highlight and delete the header, except the subject line, from the Notes section. Next, select field values for Category, Regarding, and Result.

Save in Wintouch To Active Account
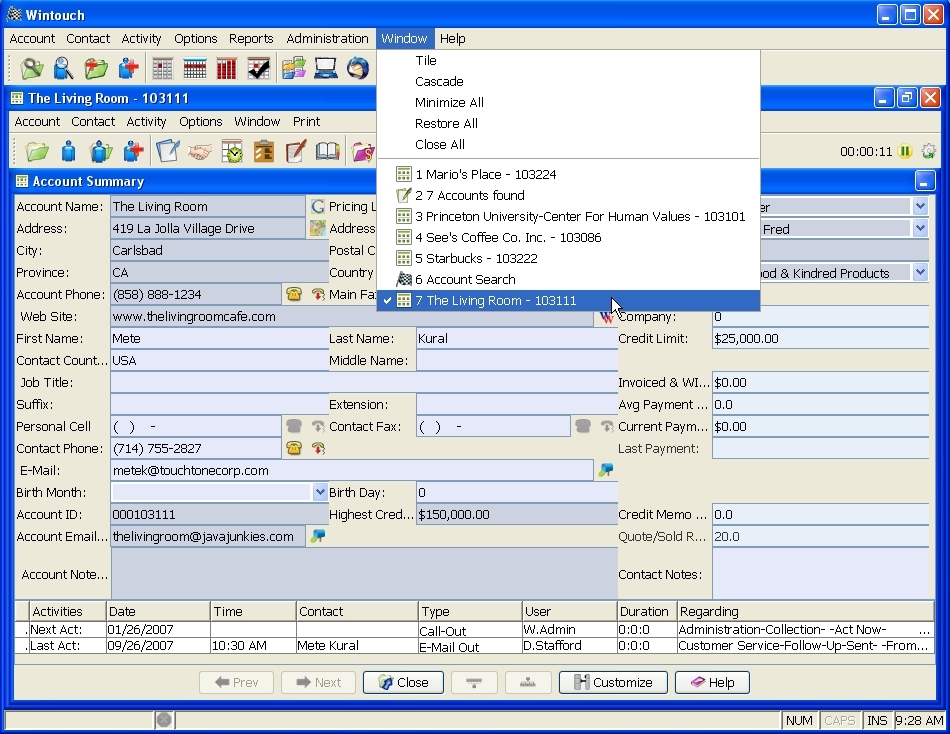
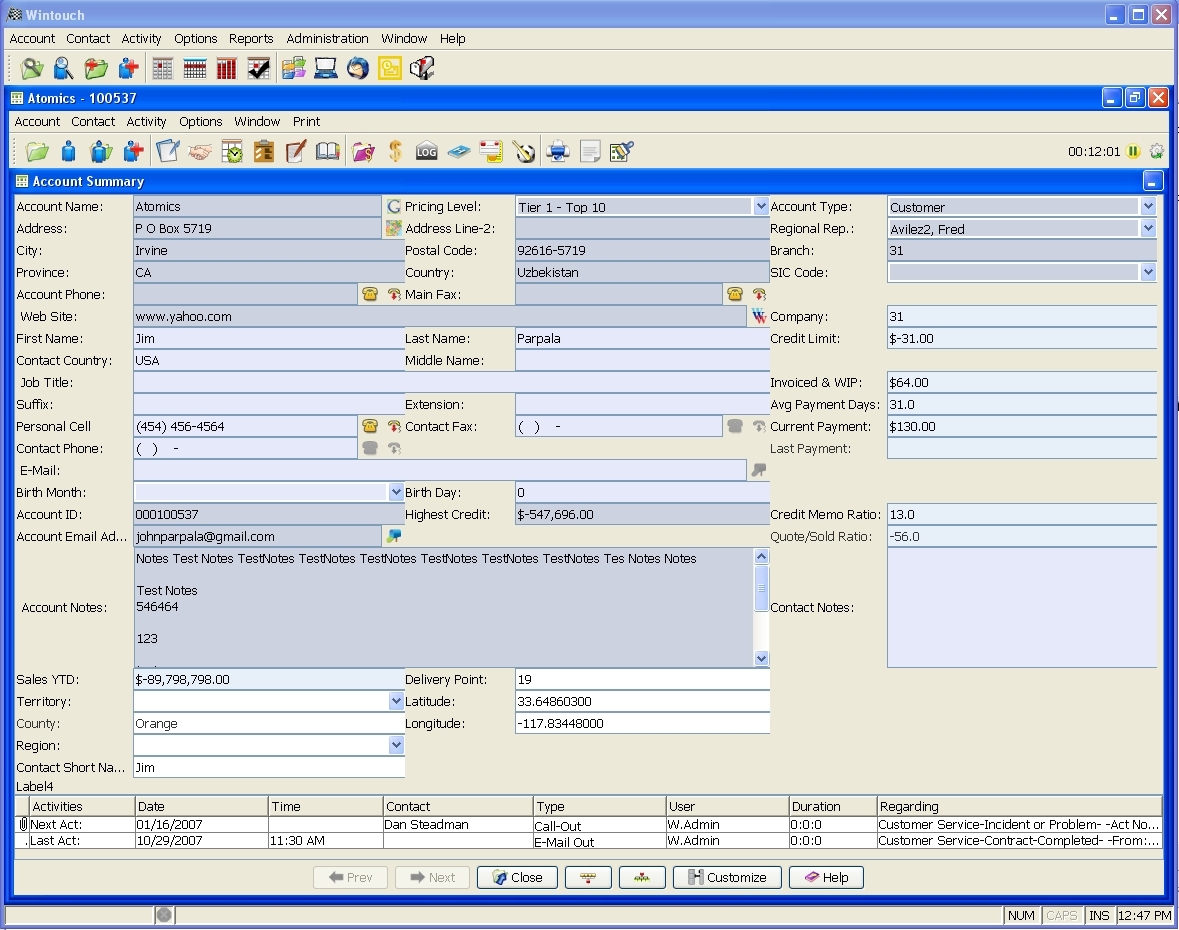
If you choose to save an email to the Wintouch active account, you must make sure that the account that is currently active in Wintouch is the one you wish to save the email to. The active window in Wintouch is whichever window is currently in focus, thus the summary window for the account you wish to save the email must be in focus for this Save option to work properly. You can determine whether a window is the active window in one of two ways. First, inactive windows will have the titlebar greyed out, whereas the active window's titlebar will be your standard window color. You can also determine the active window by looking at which window has a check mark next to its name under the Window main menu.
- In the following scren shot, 7 The Living Room - 103111 is the active window:
- If the account you wish to save the email to is the Wintouch active window, highlight the email you wish to save, then press the Wintouch button and under Save in Wintouch select the To Active Account option.

- Wintouch will automatically populate the Contact, Telephone, Date, Time, and Type fields. Therefore, with the exception of the Subject, the information from the email header is already stored in Wintouch. It is, therefore, best to highlight and delete the header, except the subject line, from the Notes section. Next, select field values for Category, Regarding, and Result, then press the OK button.
Automatically Saving All Outgoing Email to Wintouch
You can change your settings to save all outgoing email to Wintouch using the Wintouch Settings menu option.
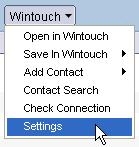
- Select the Settings option from the Wintouch menu, check the Save all outgoing mail in activity box, then press the OK button.

Now, all outgoing emails should be saved to the associated account in Wintouch.
Opening the Wintouch Account/Contact Associated with a Lotus Notes Email
For any sent or received email, you can open the associated Account Summary window using the Open in Wintouch menu option.
- Highlight the email associated with the Account/Contact you wish to open in Wintouch, then press the Wintouch button and select the Open in Wintouch option.

- If no contact is found with the email address, you will receive the a message indicating no contact was found.
If a contact with the email address is found, who is not tied to any account, the Contact Summary window will open automatically.
If a contact with the email address is found, who is tied to only one account, the associated Account Summary window will open automatically.
If there is only one contact with that email address, and s/he is associated with multiple accounts, then Wintouch will return a window containing a list of account/contact pairs. Highlight to select the correct account/contact pair from the list, then press the Open button.
- The associated Account or Contact Summary window will now open with the contact associated with the incoming or outgoing email.
Adding Contacts in Wintouch from Lotus Notes Email
You can add the sender or recipient of any email in your account as a contact in Wintouch using the Wintouch button Add Contact option. You can either add the contact to the Wintouch active window, or you can add the contact as an individual, not associated with any account. Both will be demonstrated below.
Adding A Contact to the Wintouch Active Window from Lotus Notes Email
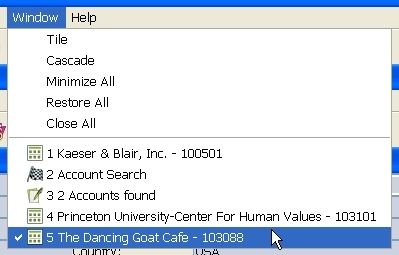
If you choose to add a contact to the Wintouch active window, you must make sure that the account that is currently active in Wintouch is the one you wish to add the contact to. The active window in Wintouch is whichever window is currently in focus. You can determine whether a window is the active window in one of two ways. First, inactive windows will have the titlebar greyed out, whereas the active window's titlebar will be your standard window color. You can also determine the active window by looking at which window has a check mark next to it's name under the Window main menu.
- In the following screen shot, 5 The Dancing Goat Cafe - 103088 is the active window.
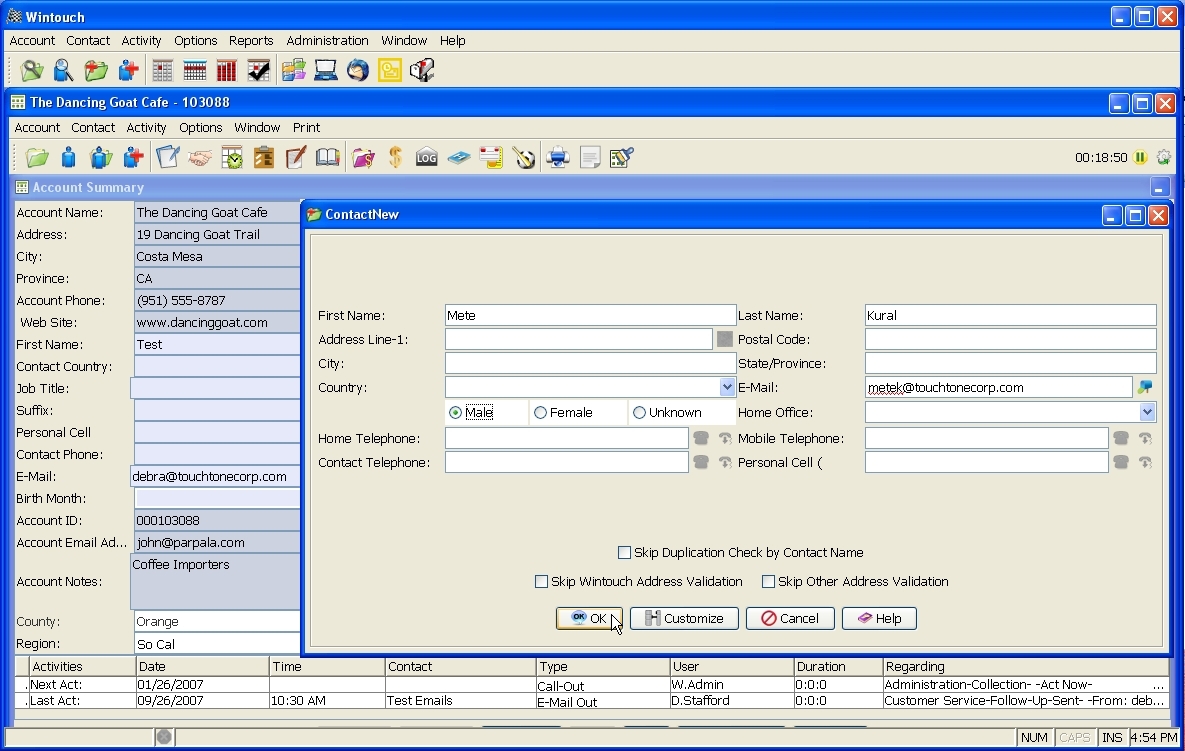
- Highlight the email sent or received by the contact you wish to save in Wintouch, then press the Wintouch button and select the Add Contact option, then select To Active Account.

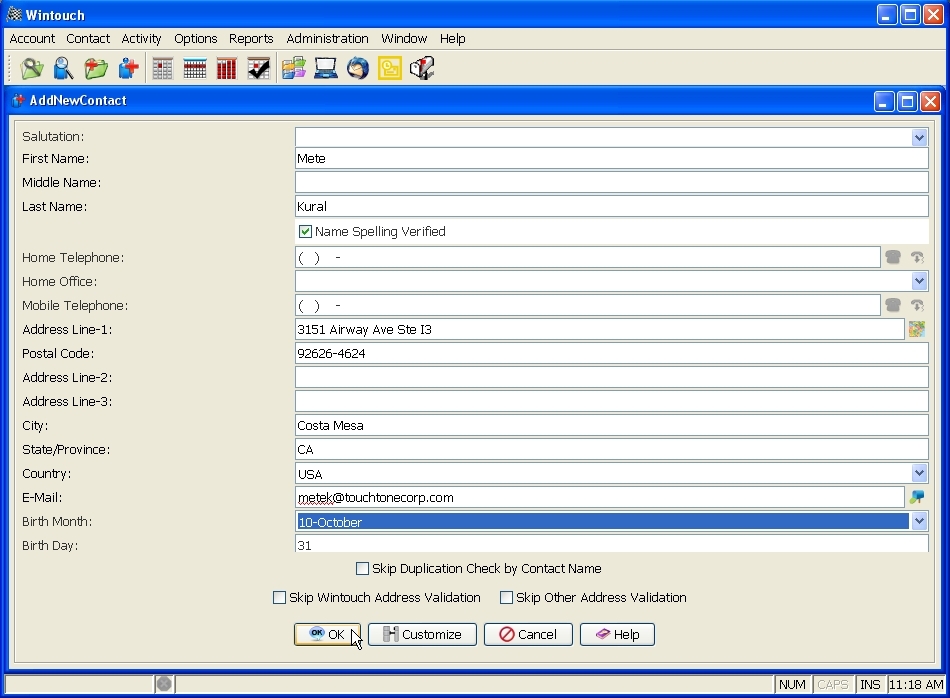
- Complete New Contact information, then press the OK button.
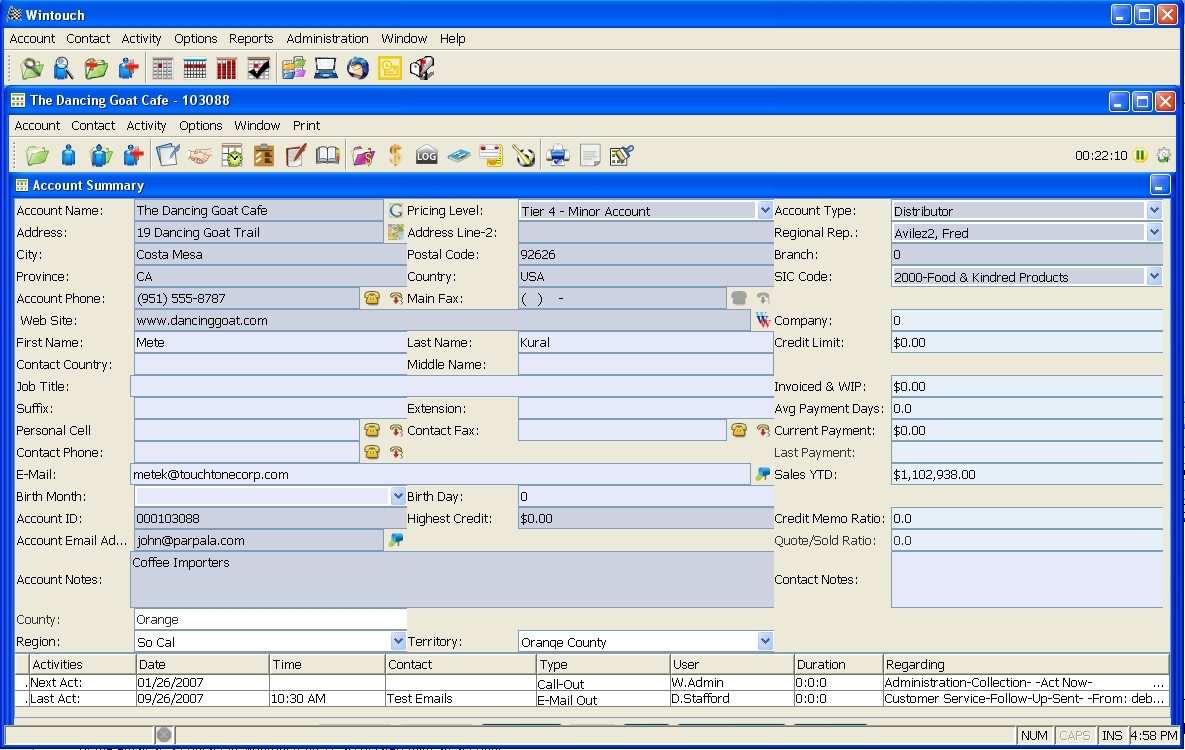
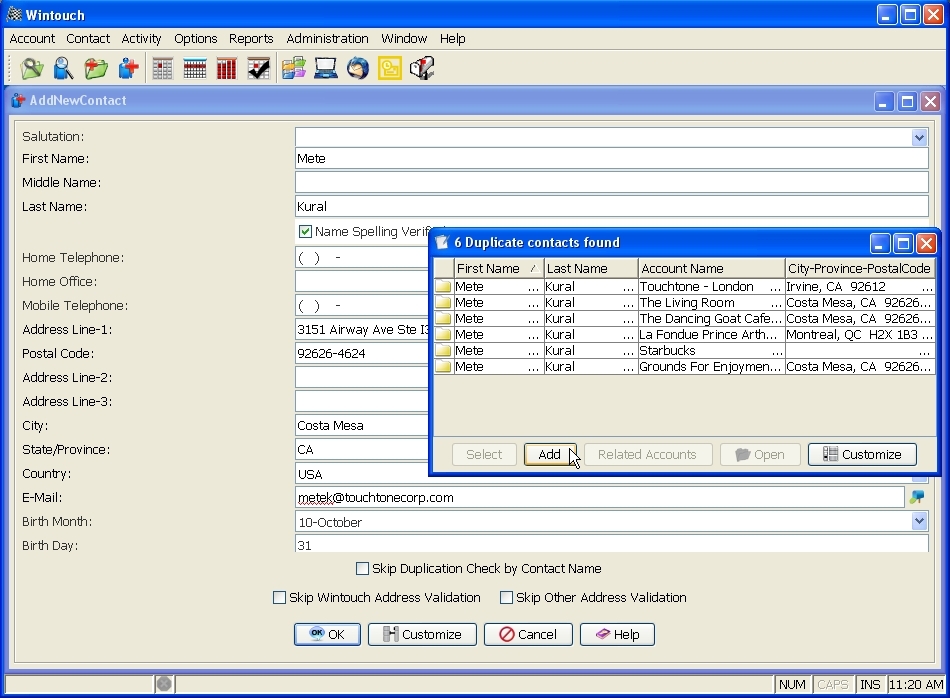
- Wintouch will now check for duplicate contacts. If the contact you are adding is not already in the system, press the Add button.

- Your new contact should now appear in the Account Summary window of the active account.
Adding A Contact to Wintouch as an Individual from Lotus Notes Email
If you add a contact as an individual, s/he will not be associated with any account. To link your new contact to an existing account, use the account relations function of the Contact Profile window.
- Highlight the incoming email from the contact you wish to save in Wintouch, press the Wintouch button and select the Add Contact option, then select As an Individual. This will add the sender of the email as a contact in Wintouch NOT associated with an account.

- Complete New Contact information, then press the OK button.
- Wintouch will now check for duplicate contacts. If the contact you are adding is not already in the system, press the Add button.
Note: The contact you just added will NOT be associated with an account in Wintouch. To add your contact directly to an already existing account in Wintouch, see the section Adding a contact to the Wintouch Active Window from Lotus Notes Email.
- If you would like to associate your new contact to an account after adding it from Lotus Notes, under the Contact menu, select Account Relations.
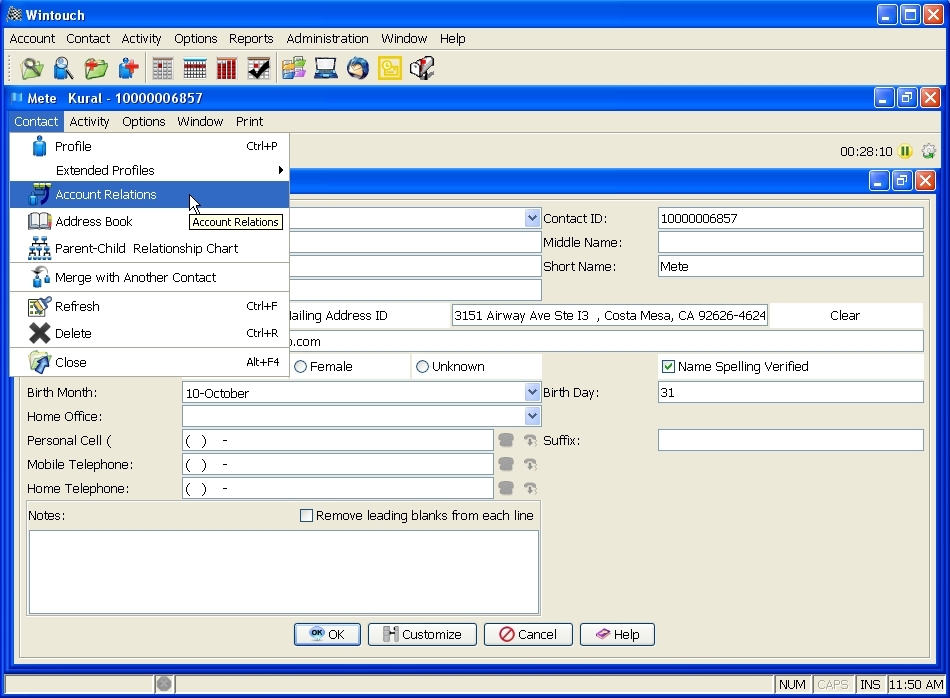
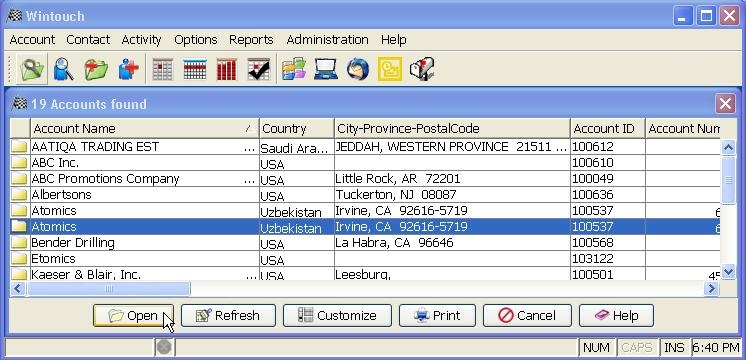
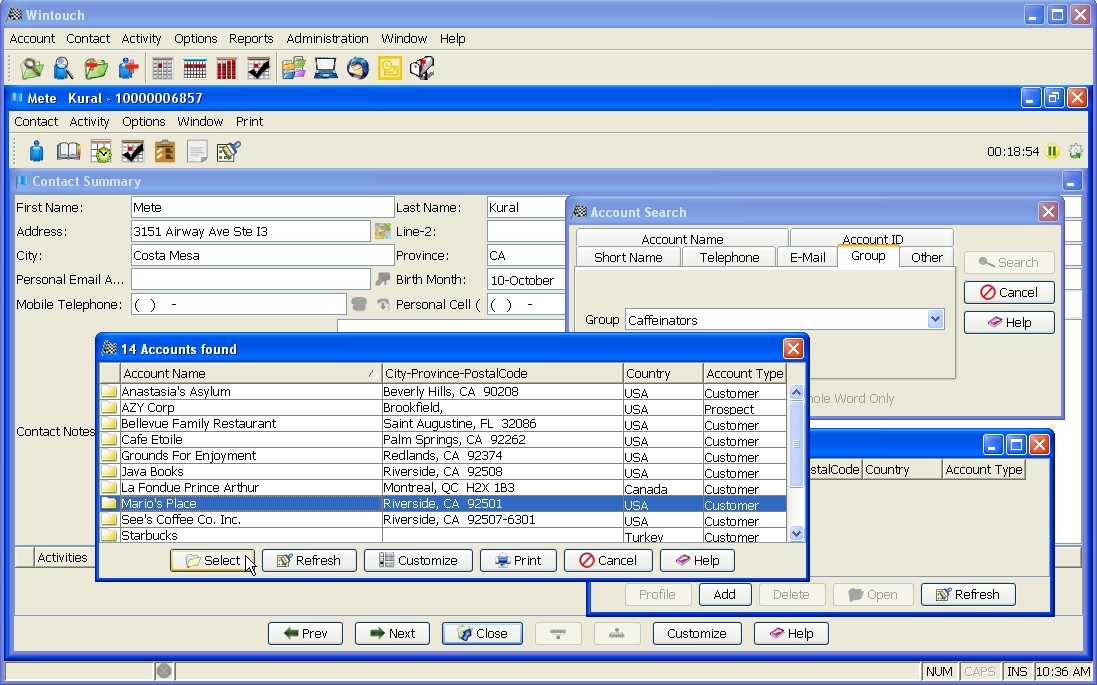
- In the Account Relations window, press the Add button to open the Account Search window.
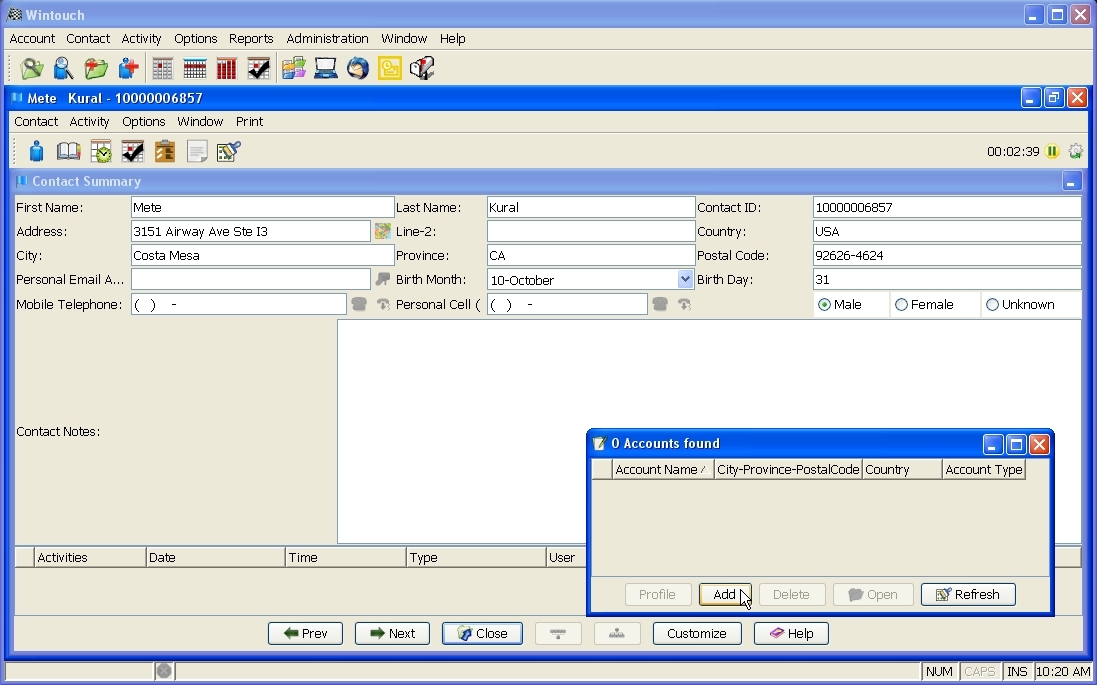
- Click on the Account Name tab, enter the name of the account you wish to associate with this contact, then press the Search button.

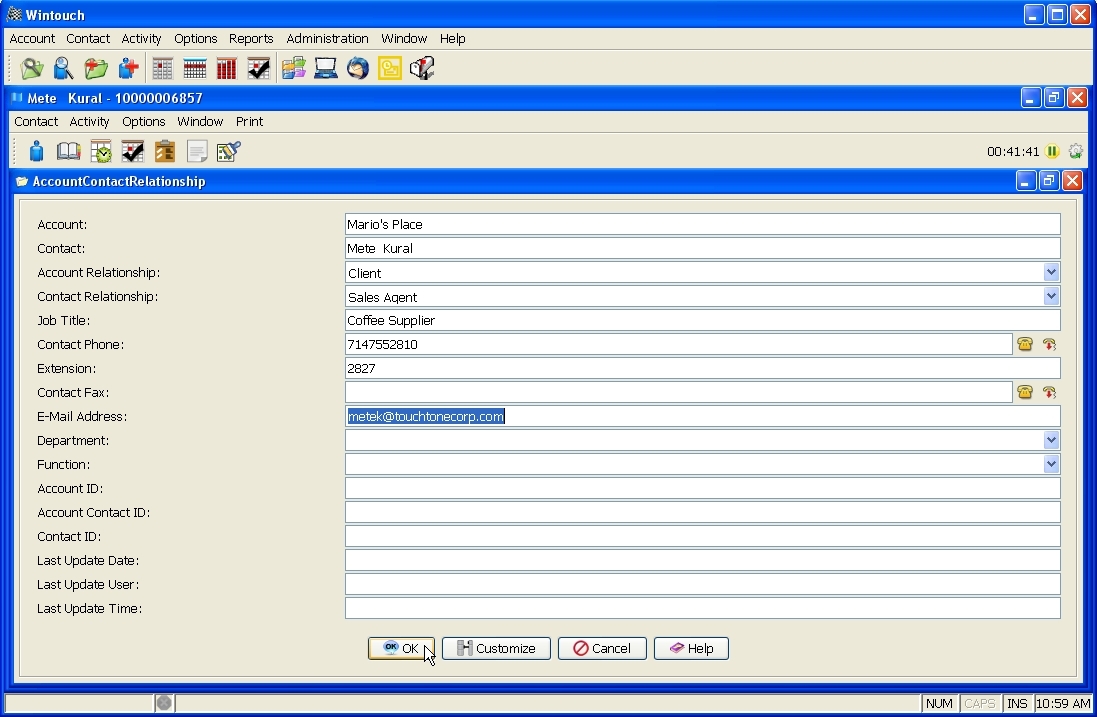
- If only one account is found, the Account-Contact Relationship window will open. If a list of accounts is returned, highlight the account you wish to associate with this contact, then press the Select button.
- Complete the Account Contact Relationship fields, then press the OK button.
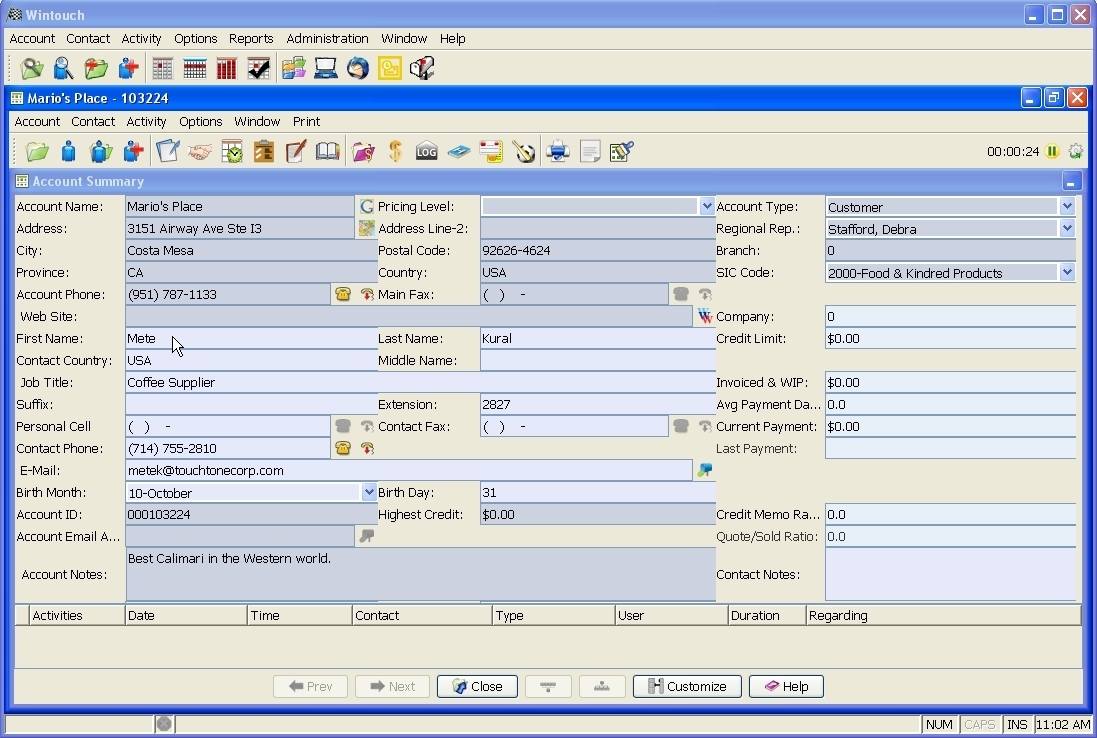
- Your new contact should now appear in the Account Summary window of the associated account.
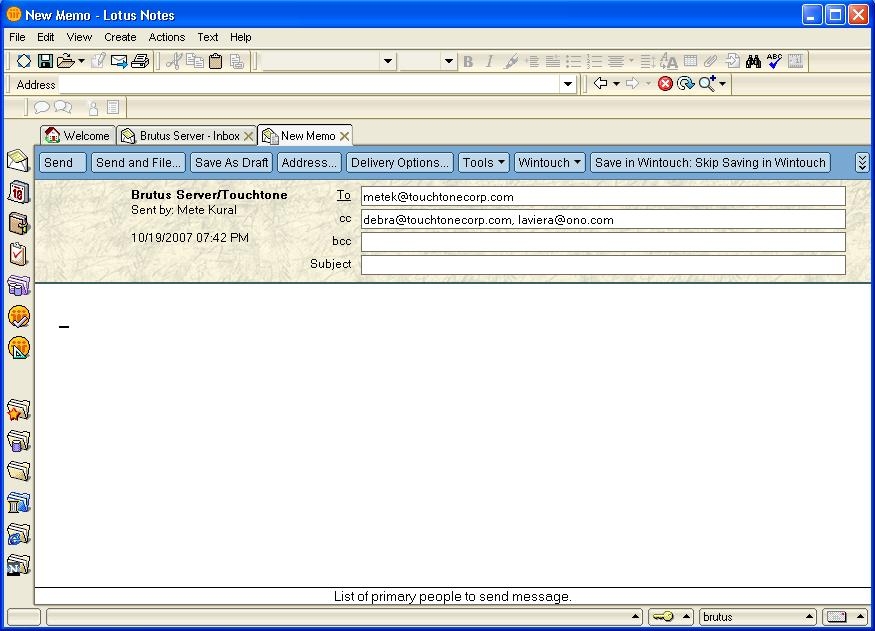
Using the Wintouch Button in the New Memo Window of Lotus Notes Email
Using the Wintouch Button Contact Search Option to Compose an Email
The connection between Lotus Notes and Wintouch allows you to search Wintouch for the email addresses of your contacts, and insert them into outgoing emails.
- To compose an email to one of your Wintouch contacts, press the Wintouch button and select the Contact Search option either in the main Lotus Notes window or in the (New Memo)Compose window.
If you select the Contact Search option in the main window when you have an email highlighted, the search window that opens will be automatically populated with the contact associated with that email. Press the OK button.
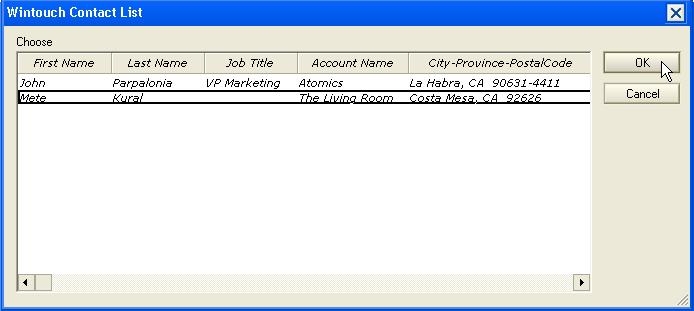
If you select the Contact Search option in the Compose window, or in the main window without an email highlighted, a blank search window will open. Enter the name and/or email address of the contact, then press OK.

- In the Wintouch Contact Search Window, type the name of the Wintouch contact you wish to send an e-mail to, then press the OK button.

- From the Wintouch Email List, highlight and select the contact you wish to e-mail.
- Click the appropriate To:, Cc:, and Bcc: for the recipients of your email.
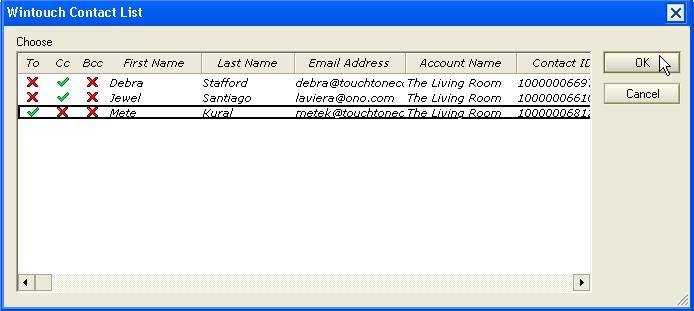
- Compose your e-mail, then press the Send button.
Saving Your Outgoing Email in Wintouch
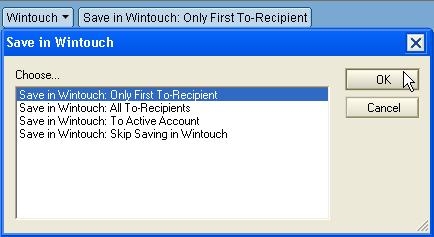
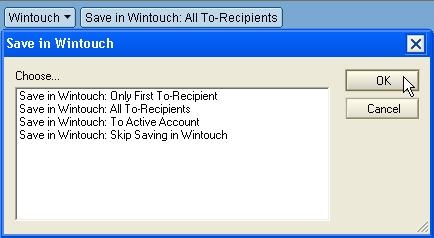
If in Settings you selected Save All Outgoing Mail in Wintouch you will be able to use the Save in Wintouch button in the Compose window to select for which contact(s) in Wintouch you want to save the email. The four options for where to save your email are: Only First To-Recipient, All To-Recipients, To Active Account or you can choose to Skip Saving in Wintouch. The default setting is Only First To-Recipient.
The Only First To-Recipient Option
If you choose this option, the summary window for the account/contact associated with the first recipient listed in the email will open, as well as a Complete a New Activity window with the email body in the Notes section.
- Press the Save in Wintouch button and select Only First To-Recipient.
- Select the recipients, compose your email, then press the Send button.
- Complete the activity that opens.
The All To-Recipients Option
If you choose this option, the summary window for the account/contact associated with the first recipient listed in the email will open, as well as a Complete a New Activity window with the email body in the Notes section. Once you Complete the Activity, the same will happen for the next recipient listed in the email. For each activity you complete, one for the next recipient will open until activities have been completed for all To-Recipients.
- Press the Save in Wintouch button and select All To-Recipients.
- Select the recipients, compose your email, then press the Send button.
- Complete each activity as it opens.
The Save to Active Account Option
You also have the option to save the outgoing email as an activity in the active account. This option is especially useful if you have 3rd-party communication regarding an account, but the 3rd-party will not be stored as a contact for the account. It can also be used when the contact/email account is associated with more than one account.
- Press the Save in Wintouch button and select To Active Account.
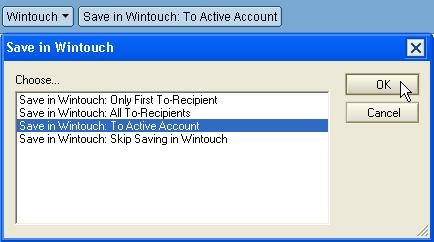
- Select the recipients, compose your email, then press the Send button.
- Complete the activity that opens.
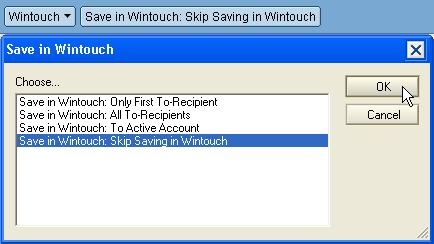
The Skip Saving in Wintouch Option
If you choose this option, the email you are sending will not be saved in Wintouch.
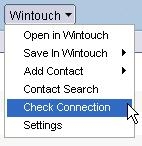
Checking the Status of the Connection between Wintouch and Lotus Notes
Upon the first Wintouch related action you take in Lotus Notes, the connection between the two should automatically be established. If the action was unsuccessful, you can check the connection status in the follwing manner.
- Press the Wintouch button and select Check Connection.
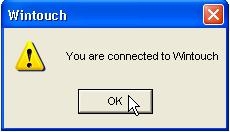
- After a brief pause, the following dialog box should display, indicating that Lotus Notes is connected to Wintouch. If this dialog box does not appear, contact your Wintouch Administrator.
Note: Click here for instructions on generating an outgoing email from the Complete An Activity window.