
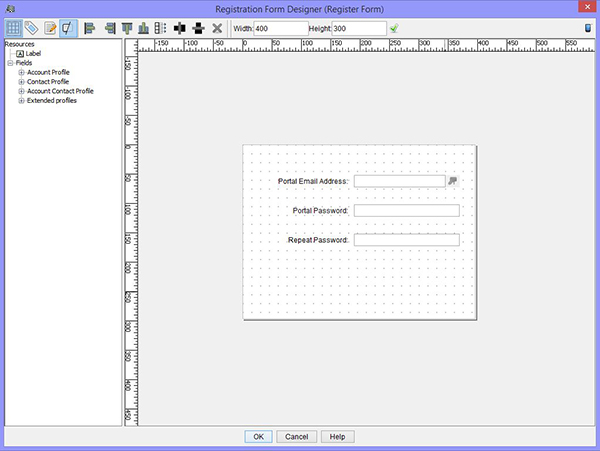
The Registration Form Designer is used for development of the portal registration forms. The form designer is opened during the initial workflow while creating a new portal. It can also be accessed by double clicking on an existing form or by highlighting a form and pressing the Edit button. The left panel contains draggable components used to design the Registration Form. From here you can add fields to the form from the Account Profile, Contact Profile, Account/Contact Profile and Extended Profiles. The Design Panel occupies the right side of the designer and is where layout formatting and field properties are applied.
Hide Background Grid: Select this icon to hide the background grid.
Properties Toggle: Toggles the display mode of the field properties. The field properties include x and y coordinates, and field width and height.
Toggle Edit Mode: Toggles between the edit mode.
Toggle Invisible Fields: Toggles the display value for the invisible fields.
Left Align: Left aligns the fields in the grid. Drag the mouse over the fields you wish to align and select the align icon.
Right Align: Right aligns the fields in the grid. Drag the mouse over the fields you wish to align and select the align icon.
Top Align:
Bottom Align:
Adjust to Same Width: Press this icon to set the selected fields to the same width. First click and drag over the fields you want to adjust, then click on the icon.
Even Space Horizontal:
Even Space Vertical: This icon allows you to evenly distribute vertical space between fields.
Delete: Delete any object in the grid by dragging the mouse over the object and selecting this icon.
Left Window Panel: This panel contains the draggable components used to design the Registration Form. From here you can add fields to the form from the Account Profile, Contact Profile, Account Contact Profile and Extended Profiles. Also you can drag labels into the Design Panel.
Right Window Panel: This is the Design Panel. The positions of the selected fields are laid out in this area. You can drag the fields around, and adjust the field widths until the form suits your needs.
Note: To change the field order for mobile devices select the Touch radio button in the upper left corner of the Designer. You can then select a field and move it either up or down by clicking on the arrow icons.
Inserting Guides: You can insert horizontal or vertical guides by hovering over the ruler and right clicking, then select Insert Guide. The guide will appear and you can drag it to the desired grid location.
Adjusting Field Width & Height: To adjust the width or height of the grid, enter the required numeric values and click on the green check icon.