Adding, Deleting, and Assigning icons to Reference Information URL'S
Add a Reference URL
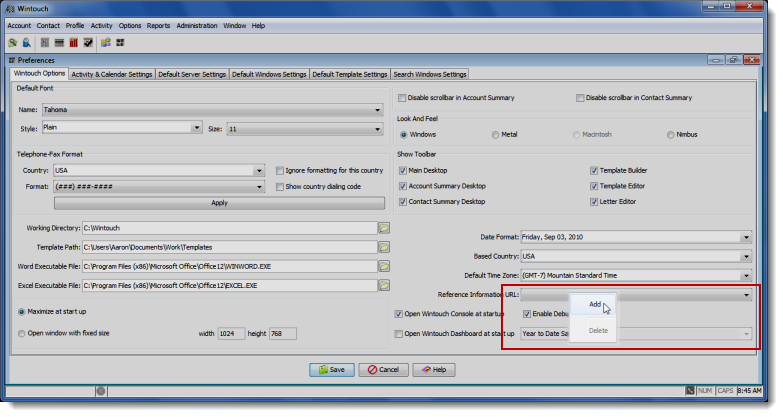
Right click on the Reference Information URL field and select Add from the pop up menu.
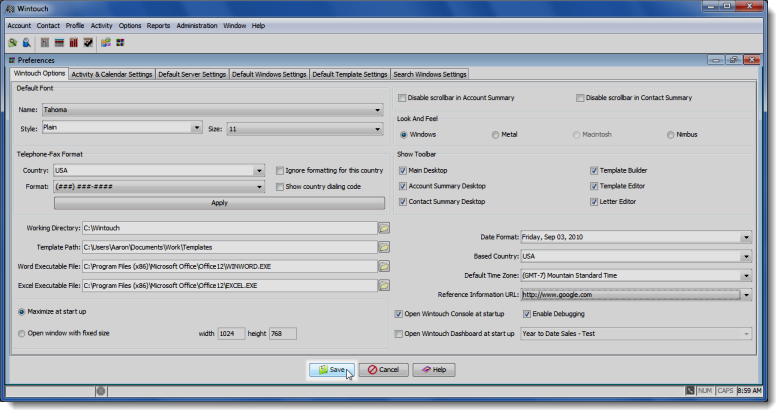
In the Add window type the complete URL that you wish to add and then select OK. For our example we will be using http:www.google.com .
Select the Save button at the bottom of the Preference window.
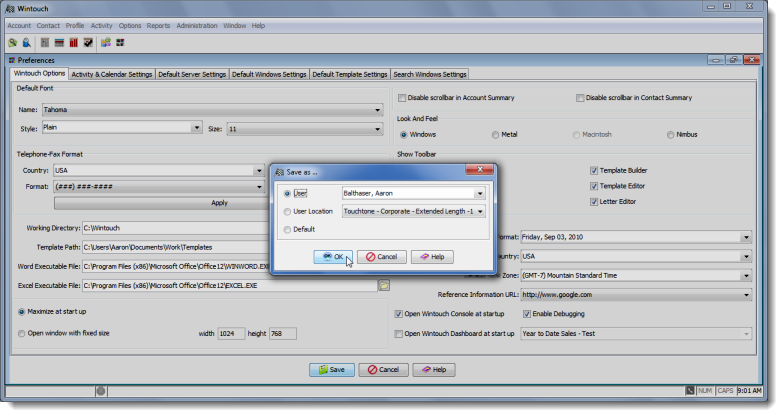
Choose the level to which you want to save your customization and select the OK button.
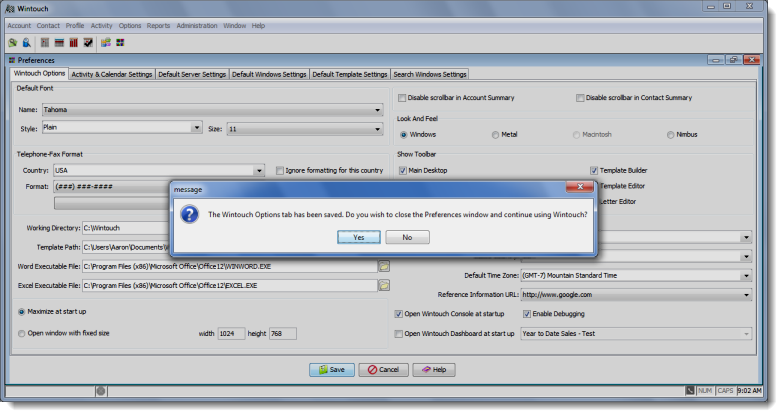
Select Yes or No in the following message dialog box depending on whether you wish to make more changes in the Preferences window or not.
Note: You must log out and log back in to apply the changes.
Delete a Reference URL
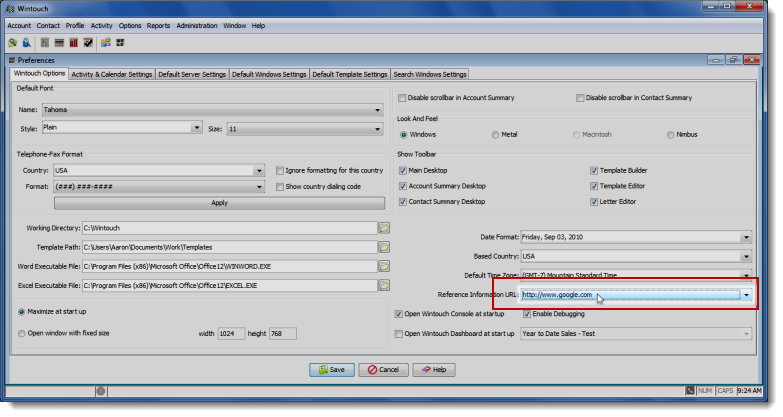
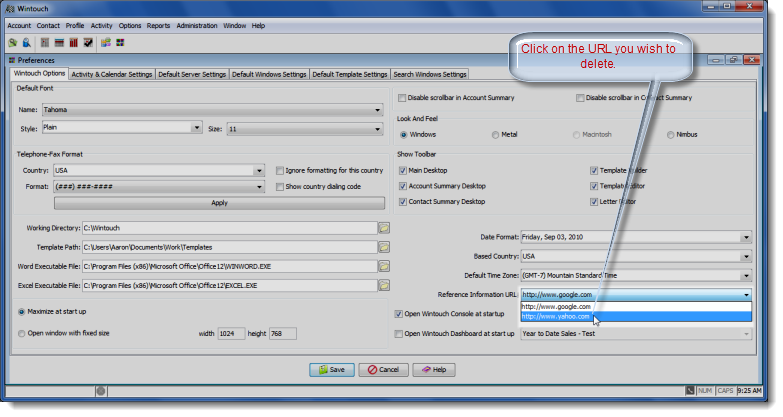
In the Preferences Wintouch Options tab click on the field Reference Information URL. You will see the drop-down field open displaying a list of the saved URL's.
In the drop-down box highlight and click on the URL you would like to delete.
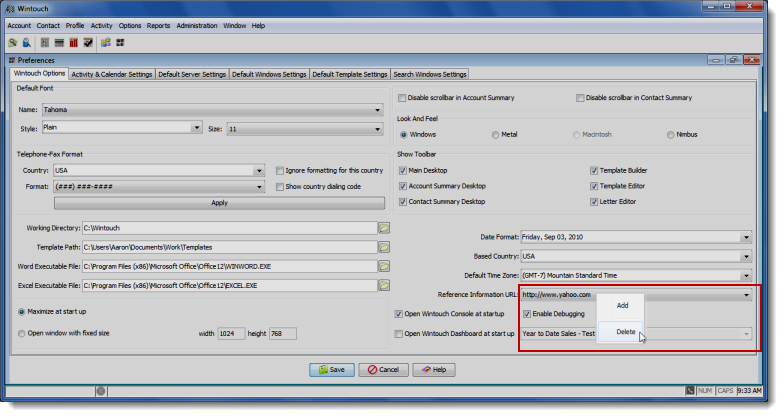
The URL you selected will appear as the displayed field in the drop-down box. Right click on the Reference Information URL field and select Delete.
Select the Save button at the bottom of the Preference window.
Choose the level to which you wish to save your customization and select the OK button.
Select Yes or No in the following message dialog box depending on whether you wish to make more changes in the Preferences window or not.
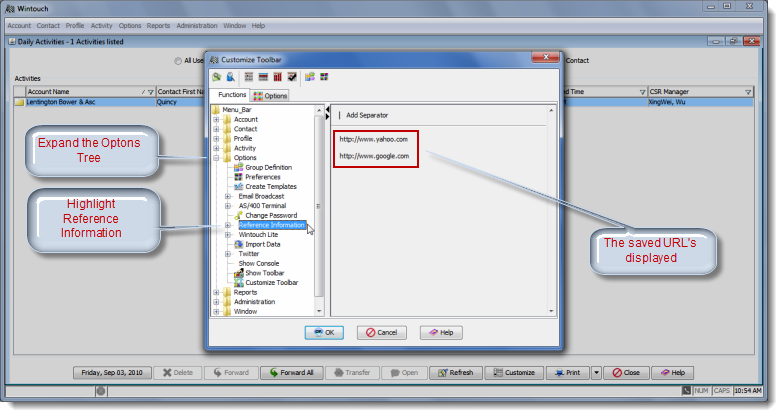
Add a Reference URL to the Toolbar and Assign an icon to a Reference URL
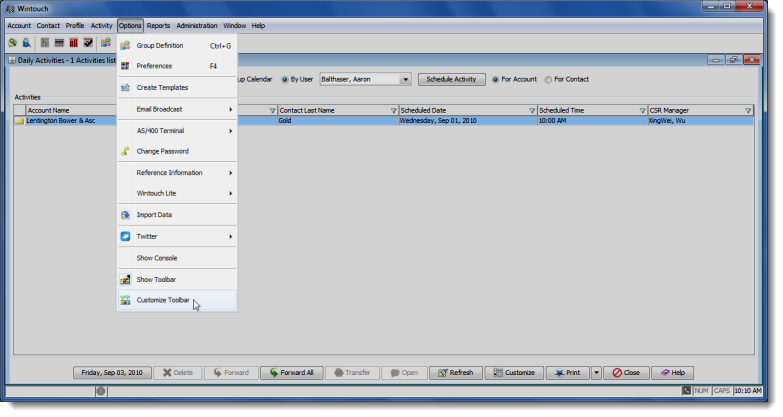
From the Main Desktop menu select Options, then select Customize Tool from the drop-down menu.
In the Customize Tool window expand the Options tree menu and then highlight Reference Information.
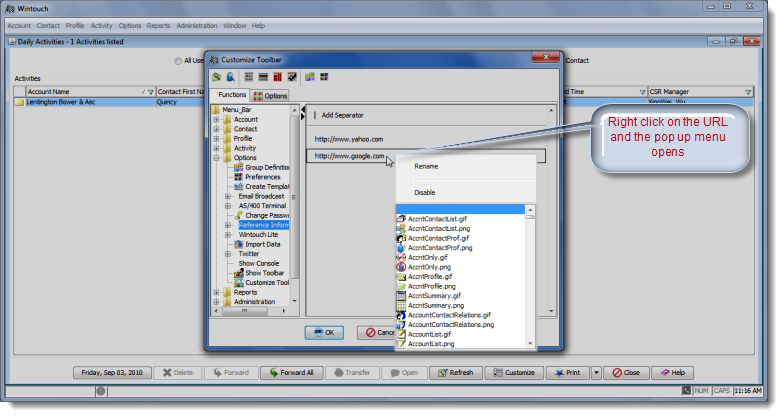
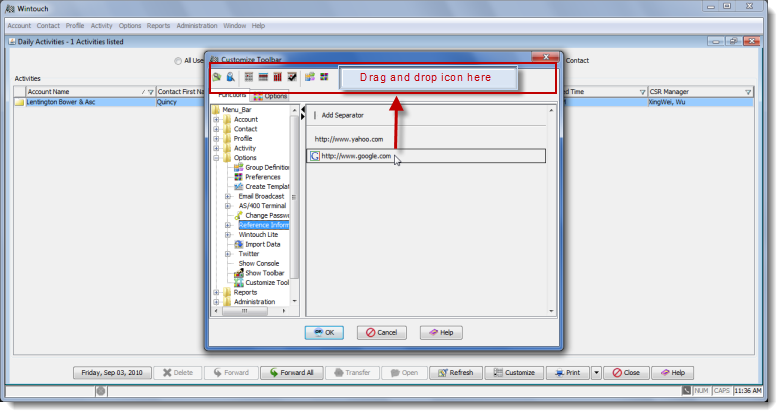
In the right window pane, right click on the URL for which you would like to create the icon.
Note: The Icon will appear on the left side of the URL.
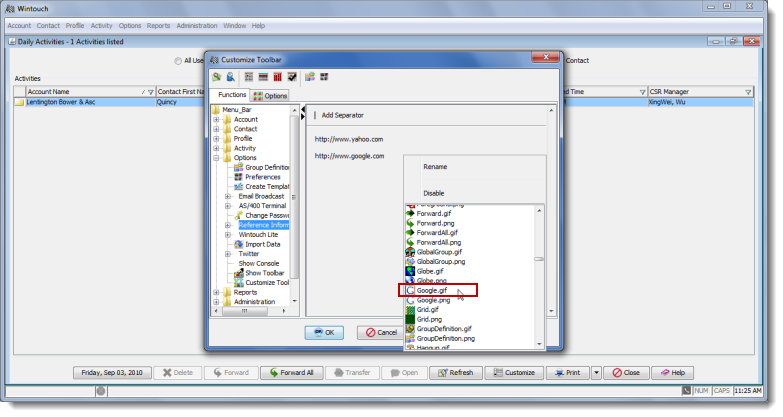
Locate and click on the icon of your choice.
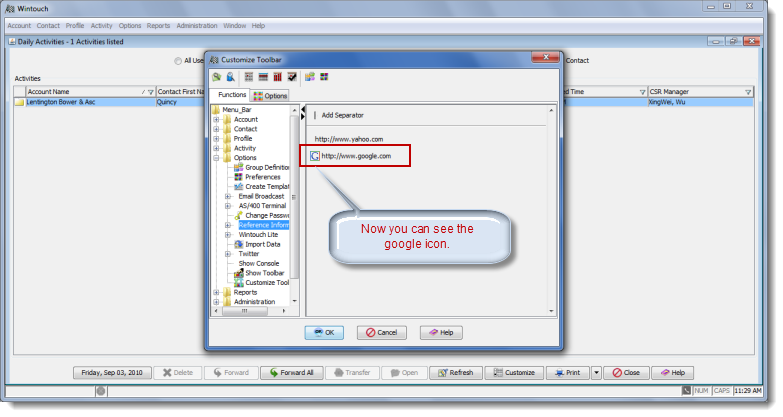
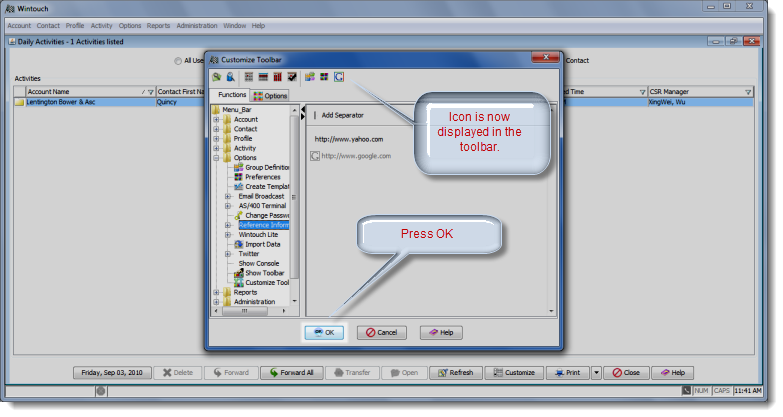
The icon is now displayed in front of the URL.
Now drag and drop the icon in the tool bar.
Now you can see the icon is displayed in the toolbar mock up. Select OK.
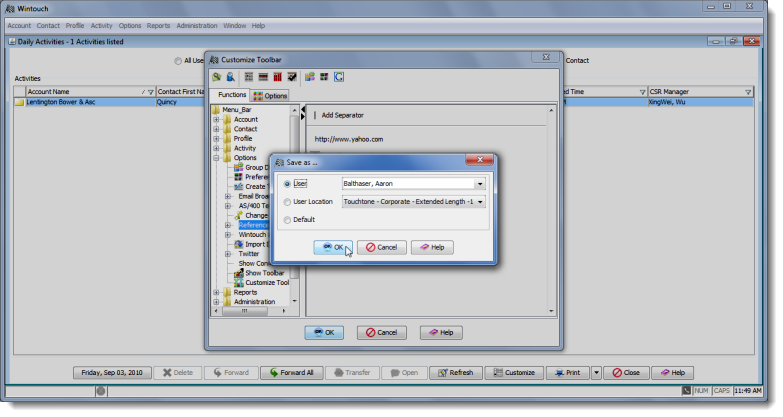
Choose the level to which you wish to save your customization and select the OK button.