Mail Merge with Microsoft Word

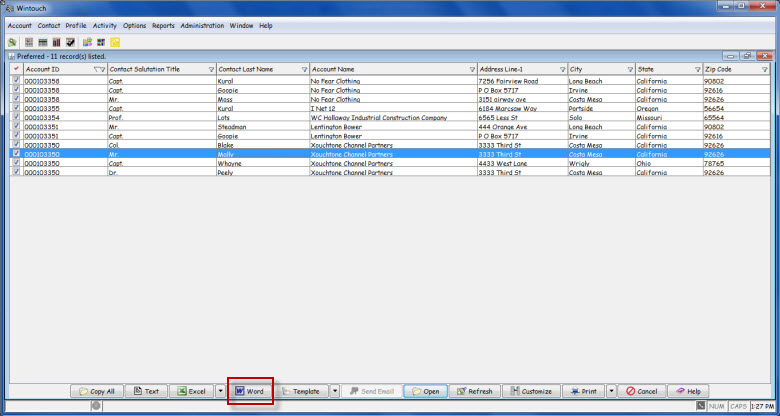
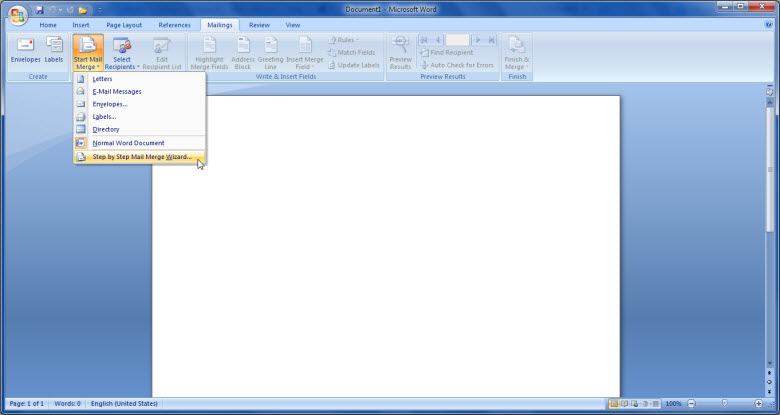
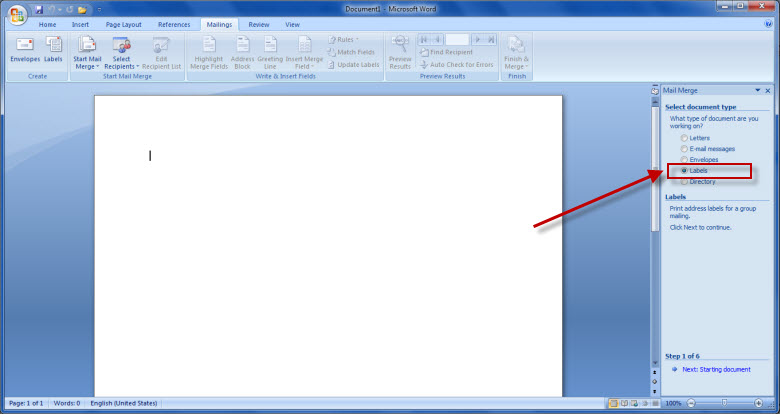
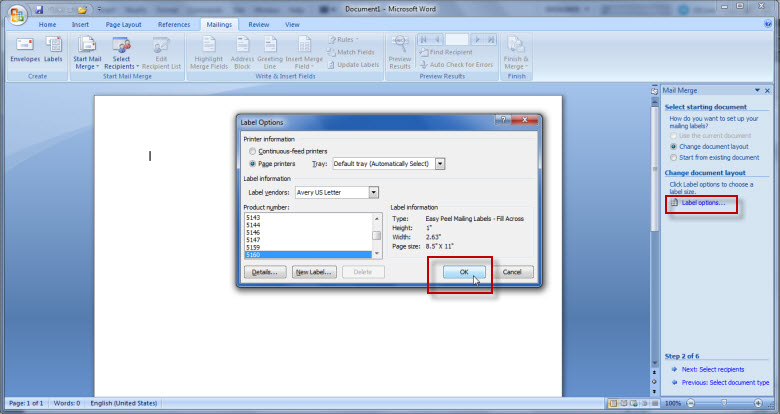
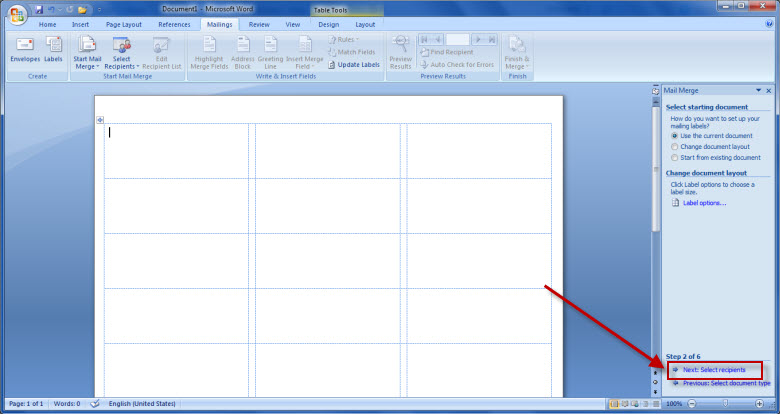
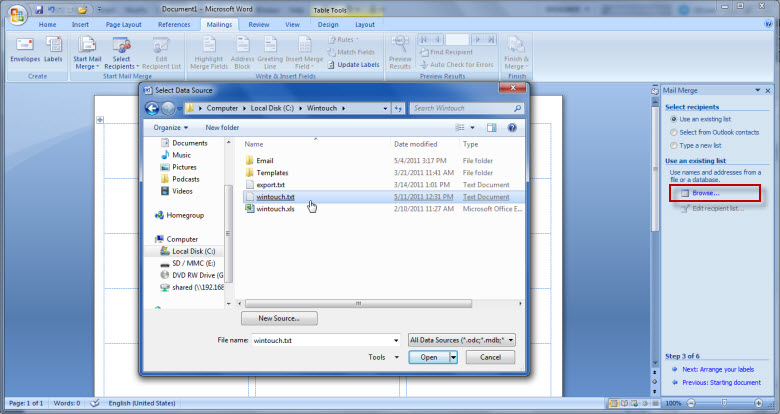
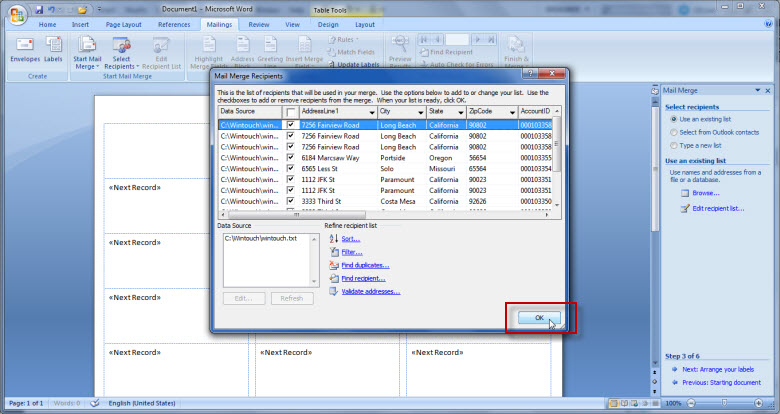
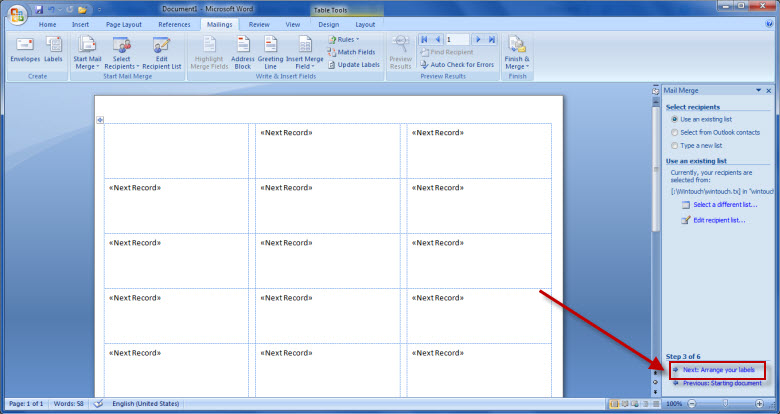
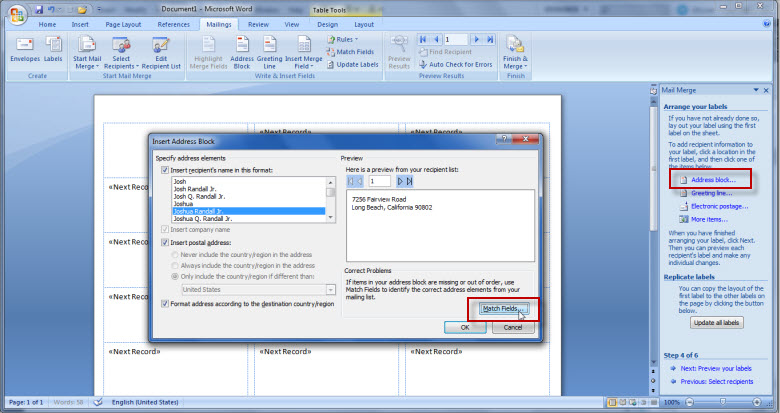
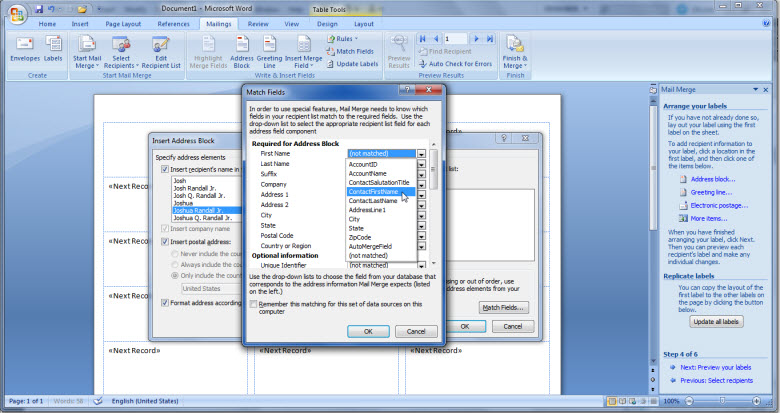
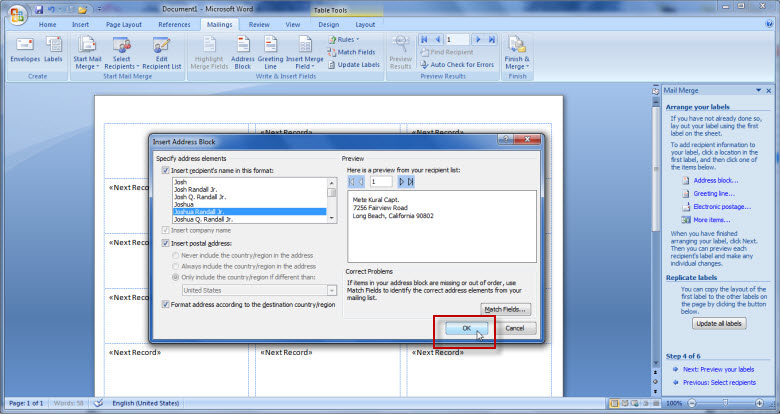
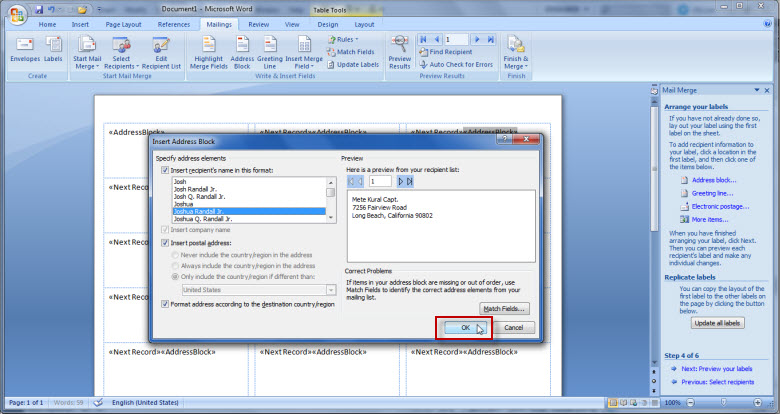
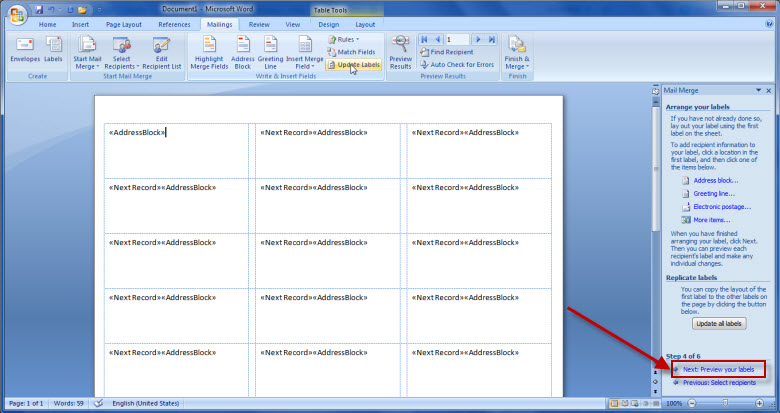
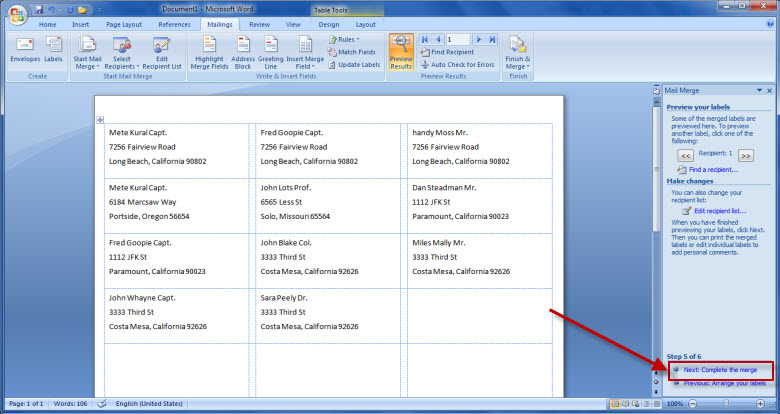
Creating each letter, Email Message,Lable and Envelope individually is really time consuming. That's where mail merge comes in. Using mail merge, all you have to do is create one document that contains the information that is the same in each copy, and add some placeholders for the information that is unique to each copy.


  1. From the Report display window, Press the Word button.


  2. Under the Mailings menu, Select Start Mail Merge to open the Step by Step Mail Merge Wizard.


  3. Select Labels as your document type, then Press the Next button.


  4. Select Label Options. When the Label Options window pops up,Select your Printer information and your Label information, then Press the OK button.


  5. Press the Next Step in order to select recipients.


  6. Open the Wintouch.txt file to initiate the merge between Wintouch and Microsoft Word.


  7. Go to the Next Step in order to Arrange your labels.


  8. Select Address block from the Write your letter box to insert a formatted address, then Click Next. In the Insert Address Block box, Select the format for the address elements, verify that the preview is displayed the way you would like, and then Press the Match Fields button.


  9. In the Match Fields box, use the drop-down list to select the Wintouch field name that corresponds to the Microsoft Word field for all fields marked "(not matched)", then Press the OK button.


  10.                 

  11. The Insert Address Block box should now have the correct information. If so, Press the OK button.


  12. Press the Update Labels in order to have the same "Address block" format for all the labels.


  13. Preview you labels, Make any changes you desire, then Click Next to complete the merge.
  14.  


  15. At this time, you may either edit your letters individually or Print them.