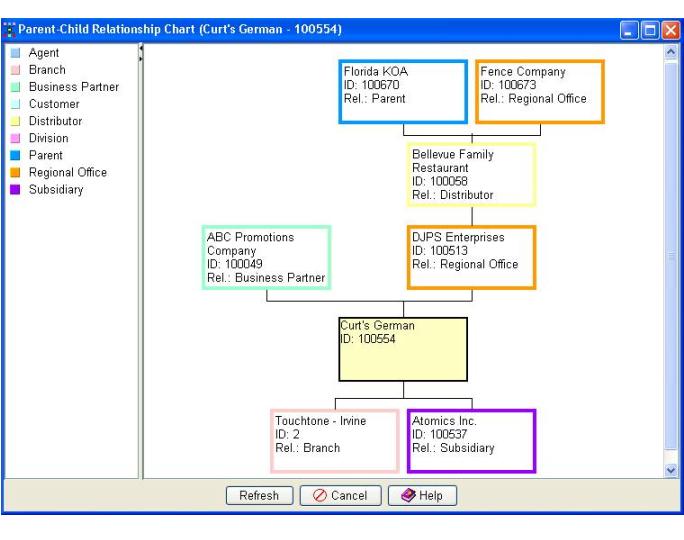

This chart shows the relationships that have been assigned to different accounts and allows you to assign parent or child relationships to accounts.

The left pane displays all of the defined parent or child relationships and the right pane shows the tree of relationships.
Note: Administrators, to add new parent or child relationships, go to the Account-to-Account Relationship Types folder in the Table Editor, and add items.
All child relationships are displayed for the accounts that are below the selected account (shaded yellow). A child icon ![]() will appear in parents of the selected account if they have other children than the selected account. Double click on the child icon to see all the children of the parent accounts. The image below is an example of a parent account with children that aren't displayed.
will appear in parents of the selected account if they have other children than the selected account. Double click on the child icon to see all the children of the parent accounts. The image below is an example of a parent account with children that aren't displayed.
![]()
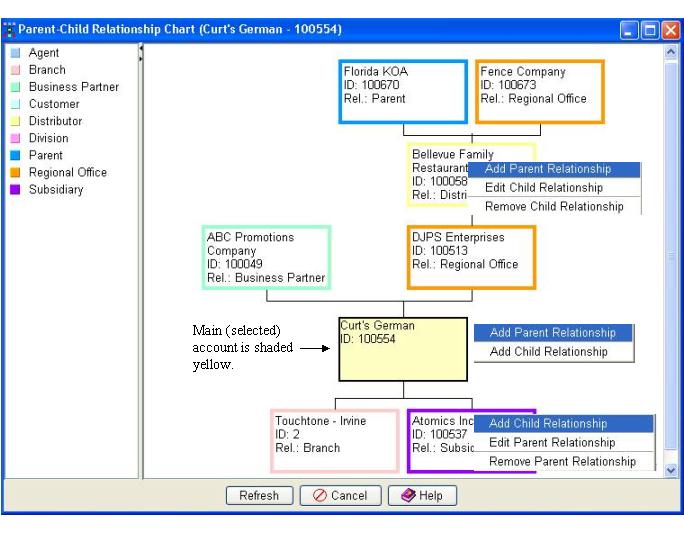
In the following example there are three different pop ups that can occur when you right-click on an account.

Add Child Relationship or Add Parent Relationship: When selected, the Account Search window will open. When you have found the appropriate account, double click on it and the Account Relationships window will open. You can edit the selected relationship in the Account Relationships Window.
Edit Child Relationship or Edit Parent Relationship: When selected the Account Relationships window will open. Assign the appropriate parent or child relationship.
Remove Child Relationship: Eliminates the selected child account from the Parent Child Graph. Both parent and child relationships are eliminated.
Remove Parent Relationship: Eliminates the selected account as a parent. Both parent and child relationships are eliminated.
Refresh: Select this button to update the list to reflect any changes since the window was opened.
Cancel: Exits the window without saving any changes or additions made in the fields and returns you to the previous window.
Help: Displays on-line help for the active window.